Battle City in Unity Part 25 : Bonus Crates - Shovel
This article is Part 25 in a 25-Part Series.
- Introduction - Battle City in Unity Prequel
- Part 1 - Battle City in Unity Part l: Single(ton) Sole Survivor
- Part 2 - Battle City in Unity Part 2: Level Creation using Tilemaps
- Part 3 - Battle City in Unity Part 3: Creation of the Protagonist and Antagonists(Tanks)
- Part 4 - Battle City in Unity Part 4: Tank Movement
- Part 5 - Battle City in Unity Part 5: Player Controller
- Part 6 - Battle City in Unity Part 6: Enemy AI
- Part 7 - Battle City in Unity Part 7: Creating Projectiles
- Part 8 - Battle City in Unity Part 8: Hurting the tanks
- Part 9 - Battle City in Unity Part 9: Firing the shots
- Part 10 - Battle City in Unity Part 10: The Spawn
- Part 11 - Battle City in Unity Part 11 : The Gamemaker - Starting the Stage and Game Over
- Part 12 - Battle City in Unity Part 12 : Level Manager
- Part 13 - Battle City in Unity Part 13 : The Gamemaker - Spawning
- Part 14 - Battle City in Unity Part 14 : The Gamemaker - Stage Cleared or Game Over
- Part 15 - Battle City in Unity Part 15 : Spawning Invincibility
- Part 16 - Battle City in Unity Part 16 : Exploding Tank animation
- Part 17 - Battle City in Unity Part 17 : Score Calculation
- Part 18 - Battle City in Unity Part 18 : Battle Status Board
- Part 19 - Battle City in Unity Part 19 : Bonus Crates - Generation
- Part 20 - Battle City in Unity Part 20 : Bonus Crates - Tank Extra Live
- Part 21 - Battle City in Unity Part 21 : Bonus Crates - Tank Invincibility
- Part 22 - Battle City in Unity Part 22 : Bonus Crates - Grenade
- Part 23 - Battle City in Unity Part 23 : Bonus Crates - Stopwatch
- Part 24 - Battle City in Unity Part 24 : Bonus Crates - Level Up
- Part 25 - This Article
Hang in there; we are almost done with the tutorials. After that, you can enjoy creating your stages. Let’s go and create the last bonus crate.
This should not be too difficult a task if we were to do it via the traditional way of using game objects to create the scene. But it becomes tricky because we build the scene using tilemaps; there appears to be no way to paint the tiles programmatically as we are unable to access the tile palette from code(at least I cannot find any).
But Unity has allowed us to copy tiles from tilemap using code. So by doing creative usage of the
Getting Tile Positions
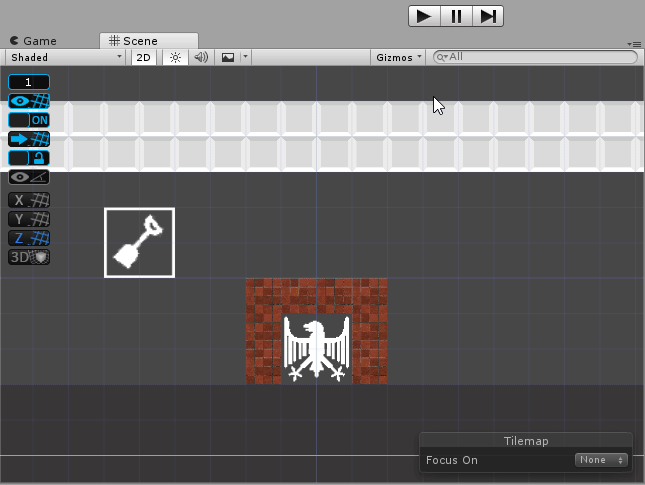
The first thing we need to do is to determine the tile position of the bricks surrounding the eagle. That can be done by using the
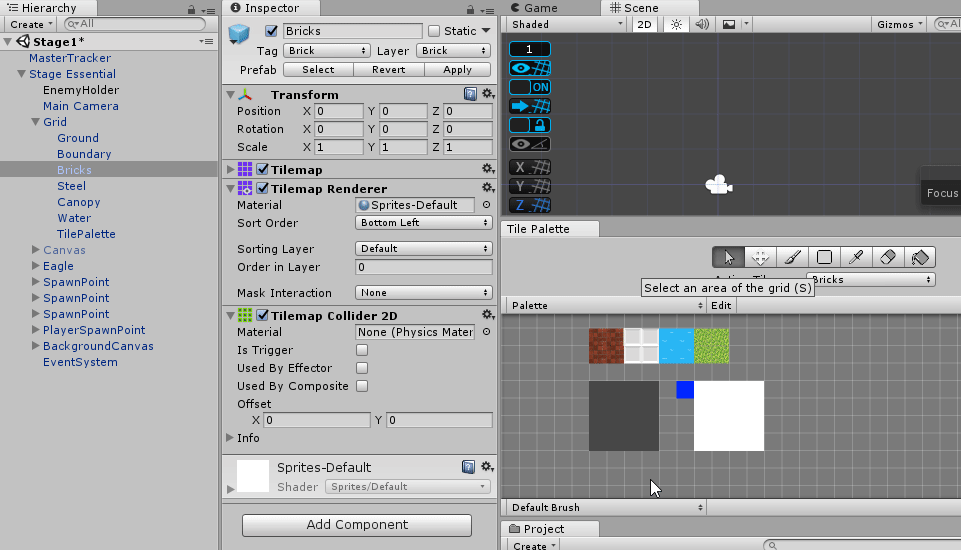
Creating the Tile Palette
Let’s start by putting the TilePalette TileMap on top so that we can see it by changing its Order by Layer to 3. Change the Active Tilemap to TilePalette then paint the brick tile at position 0,0 and steel tile at location 1,1. Then change the Order to Layer to -2, so it will not appear on the scene.
Changing the tiles
We start by creating a script in the Grid Game Object calling it
using UnityEngine.Tilemaps;The concept is to remove the brick tiles at the location from Brick TileMap and replace it with Steel tiles on the Steel TileMap then vice-versus to revert. So we can create a single routine to do both by taking in the position, tile to change to and the tilemaps. Let’s call this routine
void UpdateAndRemoveTile(Vector3 position, TileBase tile, Tilemap tileMapToRemoveFrom, Tilemap tileMapToUpdate)
{
    tileMapToRemoveFrom.SetTile(tileMapToRemoveFrom.WorldToCell(position), null);
    tileMapToUpdate.SetTile(tileMapToUpdate.WorldToCell(position), tile);
}
Getting the reference
To use the Tilemaps, we will need to get their reference in code. Declare 3 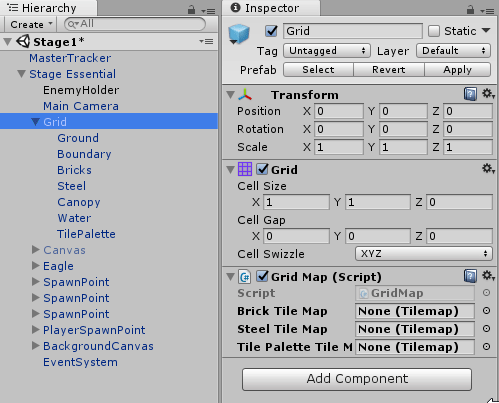
With this in, it will be easy to use the code below to trigger the UpdateAndRemoveTile routine.
Vector3 steelTilePosition = new Vector3(1, 1, 0);
TileBase steelTile = tilePaletteTileMap.GetTile(tilePaletteTileMap.WorldToCell(steelTilePosition));
UpdateAndRemoveTile(new Vector3(-2,-13,0), steelTile, brickTileMap, steelTileMap)We need to run the same command on the 6 tiles surrounding the eagle twice(once for turning brick to steel and then for steel to brick). We can split it into 3 routines to shorten the amount of code we need to write. 2 of the routines(
void UpdateTile(TileBase tile, Tilemap tileMapToRemoveFrom, Tilemap tileMapToUpdate)
{
    UpdateAndRemoveTile(new Vector3(-2f, -13f, 0), tile, tileMapToRemoveFrom, tileMapToUpdate);
    UpdateAndRemoveTile(new Vector3(-2f, -12f, 0), tile, tileMapToRemoveFrom, tileMapToUpdate);
    UpdateAndRemoveTile(new Vector3(-2f, -11f, 0), tile, tileMapToRemoveFrom, tileMapToUpdate);
    UpdateAndRemoveTile(new Vector3(-1f, -11f, 0), tile, tileMapToRemoveFrom, tileMapToUpdate);
    UpdateAndRemoveTile(new Vector3(0f, -11f, 0), tile, tileMapToRemoveFrom, tileMapToUpdate);
    UpdateAndRemoveTile(new Vector3(1f, -11f, 0), tile, tileMapToRemoveFrom, tileMapToUpdate);
    UpdateAndRemoveTile(new Vector3(1f, -12f, 0), tile, tileMapToRemoveFrom, tileMapToUpdate);
    UpdateAndRemoveTile(new Vector3(1f, -13f, 0), tile, tileMapToRemoveFrom, tileMapToUpdate);
    tileMapToUpdate.gameObject.GetComponent<TilemapCollider2D>().enabled = false;
    tileMapToUpdate.gameObject.GetComponent<TilemapCollider2D>().enabled = true;
}
void ChangeEagleWallToSteel()
{
    Vector3 steelTilePosition = new Vector3(1f, 1f, 0);
    TileBase steelTile = tilePaletteTileMap.GetTile(tilePaletteTileMap.WorldToCell(steelTilePosition));
    UpdateTile(steelTile, brickTileMap, steelTileMap);
}
void ChangeEagleWallToBrick()
{
    Vector3 brickTilePosition = new Vector3(0f, 0f, 0);
    TileBase brickTile = tilePaletteTileMap.GetTile(tilePaletteTileMap.WorldToCell(brickTilePosition));
    UpdateTile(brickTile, steelTileMap, brickTileMap);
}
Finally we need to create a coroutine to have a timer rundown so that we can have the effect of the steel wall turn back to the brick wall after a period. Then have a Public routine to start the coroutine. This will allow the Spade Bonus Crate to trigger the routine to activate the coroutine.(remember a Game Object that is going to be destroyed cannot start a coroutine as it will cancel the coroutine as well)
public void ActivateSpadePower()
{
    StartCoroutine(SpadePowerUpActivated());
}
IEnumerator SpadePowerUpActivated()
{
    ChangeEagleWallToSteel();
    yield return new WaitForSeconds(20f);
    ChangeEagleWallToBrick();
}
Create the Spade Bonus Crate
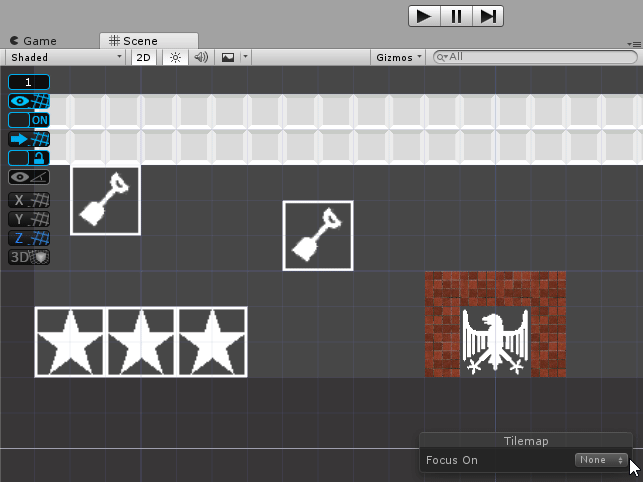
Now we can create the Spade Bonus Crate. Start by dragging and dropping the Sprite you have for Spade bonus crate into the hierarchy which Unity will help to create the Game Object for you. Call the Game Object
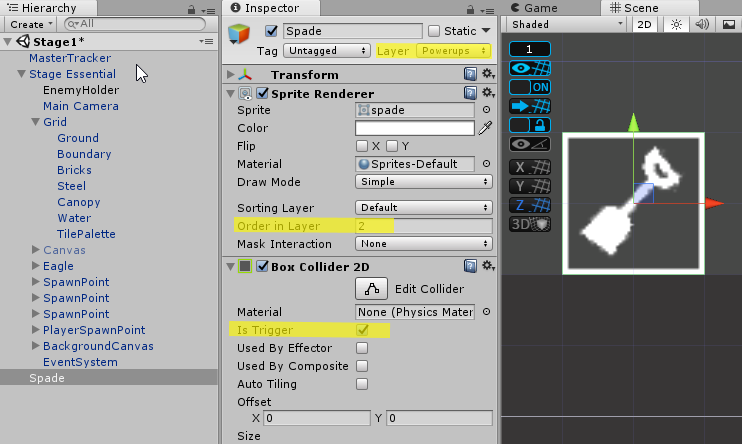
Now we will create the code for the Spade crate. Add a new script called
using System.Collections;
using System.Collections.Generic;
using UnityEngine;

public class Spade : PowerUps
{
    GameObject grid;
    protected override void Start()
    {
        base.Start();
        grid = GameObject.Find("Grid");
    }
    private void OnTriggerEnter2D(Collider2D collision)
    {
        GridMap gridmap = grid.GetComponent<GridMap>();
        gridmap.ActivateSpadePower();
        Destroy(this.gameObject);
    }
}Now we are ready to try out!
Perfect! We are on a roll! Let’s iron out a few details to make it more like Battle City. The first one will be the part where it is changing between steel wall and brick wall repetitively at the tail end of the timer before it completely changes back to the brick wall. To do this, we need to make ChangeEagleWallToSteel a coroutine and update SpadePowerUpActivated coroutine as below.
IEnumerator SpadePowerUpActivated()
{
    StartCoroutine(ChangeEagleWallToSteel());
    yield return new WaitForSeconds(20f);
    ChangeEagleWallToBrick();
}
IEnumerator ChangeEagleWallToSteel()
{
    Vector3 steelTilePosition = new Vector3(1f, 1f, 0);
    Vector3 brickTilePosition = new Vector3(0f, 0f, 0);
    TileBase steelTile = tilePaletteTileMap.GetTile(tilePaletteTileMap.WorldToCell(steelTilePosition));
    TileBase brickTile = tilePaletteTileMap.GetTile(tilePaletteTileMap.WorldToCell(brickTilePosition));
    UpdateTile(steelTile, brickTileMap, steelTileMap);
    yield return new WaitForSeconds(15f);
    for (int i = 0; i < 5; i++){
        UpdateTile(brickTile, steelTileMap, steelTileMap);
        yield return new WaitForSeconds(0.5f);
        UpdateTile(steelTile, steelTileMap, steelTileMap);
        yield return new WaitForSeconds(0.5f);
    }
}
Let’s try it again.
One item chalked off. Now to the last one. There are circumstances that a player might accidentally(cough…cough…foolishly) shoot at the steel wall with its Level 4 tank which will result in the steel wall to be damaged. In this case, the damaged part will not be filled back with bricks anymore. To create this effect, we will need to update an if statement to check if there is still a tile at a position in the UpdateAndRemoveTile routine.
void UpdateAndRemoveTile(Vector3 position, TileBase tile, Tilemap tileMapToRemoveFrom, Tilemap tileMapToUpdate)
{
if (!(tileMapToRemoveFrom == steelTileMap && tileMapToRemoveFrom.GetTile(tileMapToRemoveFrom.WorldToCell(position)) == null))
{
tileMapToRemoveFrom.SetTile(tileMapToRemoveFrom.WorldToCell(position), null);
tileMapToUpdate.SetTile(tileMapToUpdate.WorldToCell(position), tile);
}
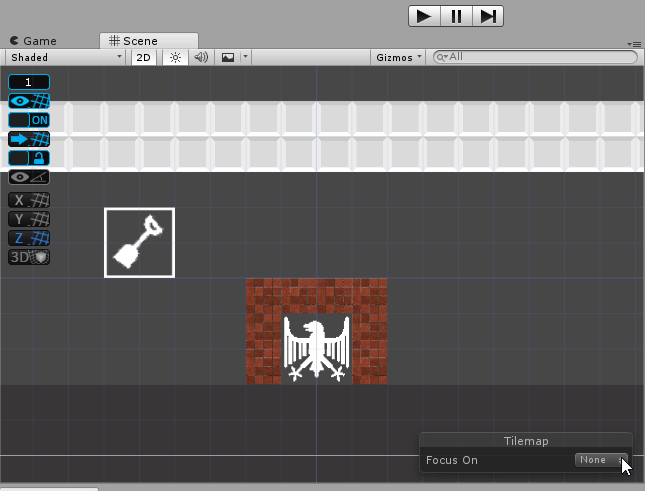
}Now let’s do a full test on the effect.(I have shortened the Spade Bonus timer to 5 seconds for the testing) The spade should be able to:
- Fill back any damaged brick tiles around the eagle
- Have the flickering effect of brick and steel at the tail end of the Spade Bonus timer
- Not have the ability to fill back the brick tiles at location where the steel tiles around the eagle are damaged.
That’s all the Bonus Crates! Prefab the Spade crate and then update the GamePlayerManager with all the bonus crate prefabs.
That will be the end of my tutorial series for Battle City. There are of course other stuffs which I did not cover such as sounds and start menu. I want to get feedback on my tutorials from you all before working on those so that I can improve myself. So please put in the comments how I can improve! Thanks.
The game link for testing is here.
This article is Part 25 in a 25-Part Series.
- Introduction - Battle City in Unity Prequel
- Part 1 - Battle City in Unity Part l: Single(ton) Sole Survivor
- Part 2 - Battle City in Unity Part 2: Level Creation using Tilemaps
- Part 3 - Battle City in Unity Part 3: Creation of the Protagonist and Antagonists(Tanks)
- Part 4 - Battle City in Unity Part 4: Tank Movement
- Part 5 - Battle City in Unity Part 5: Player Controller
- Part 6 - Battle City in Unity Part 6: Enemy AI
- Part 7 - Battle City in Unity Part 7: Creating Projectiles
- Part 8 - Battle City in Unity Part 8: Hurting the tanks
- Part 9 - Battle City in Unity Part 9: Firing the shots
- Part 10 - Battle City in Unity Part 10: The Spawn
- Part 11 - Battle City in Unity Part 11 : The Gamemaker - Starting the Stage and Game Over
- Part 12 - Battle City in Unity Part 12 : Level Manager
- Part 13 - Battle City in Unity Part 13 : The Gamemaker - Spawning
- Part 14 - Battle City in Unity Part 14 : The Gamemaker - Stage Cleared or Game Over
- Part 15 - Battle City in Unity Part 15 : Spawning Invincibility
- Part 16 - Battle City in Unity Part 16 : Exploding Tank animation
- Part 17 - Battle City in Unity Part 17 : Score Calculation
- Part 18 - Battle City in Unity Part 18 : Battle Status Board
- Part 19 - Battle City in Unity Part 19 : Bonus Crates - Generation
- Part 20 - Battle City in Unity Part 20 : Bonus Crates - Tank Extra Live
- Part 21 - Battle City in Unity Part 21 : Bonus Crates - Tank Invincibility
- Part 22 - Battle City in Unity Part 22 : Bonus Crates - Grenade
- Part 23 - Battle City in Unity Part 23 : Bonus Crates - Stopwatch
- Part 24 - Battle City in Unity Part 24 : Bonus Crates - Level Up
- Part 25 - This Article

