Battle City in Unity Part 13 : The Gamemaker - Spawning
This article is Part 13 in a 25-Part Series.
- Introduction - Battle City in Unity Prequel
- Part 1 - Battle City in Unity Part l: Single(ton) Sole Survivor
- Part 2 - Battle City in Unity Part 2: Level Creation using Tilemaps
- Part 3 - Battle City in Unity Part 3: Creation of the Protagonist and Antagonists(Tanks)
- Part 4 - Battle City in Unity Part 4: Tank Movement
- Part 5 - Battle City in Unity Part 5: Player Controller
- Part 6 - Battle City in Unity Part 6: Enemy AI
- Part 7 - Battle City in Unity Part 7: Creating Projectiles
- Part 8 - Battle City in Unity Part 8: Hurting the tanks
- Part 9 - Battle City in Unity Part 9: Firing the shots
- Part 10 - Battle City in Unity Part 10: The Spawn
- Part 11 - Battle City in Unity Part 11 : The Gamemaker - Starting the Stage and Game Over
- Part 12 - Battle City in Unity Part 12 : Level Manager
- Part 13 - This Article
- Part 14 - Battle City in Unity Part 14 : The Gamemaker - Stage Cleared or Game Over
- Part 15 - Battle City in Unity Part 15 : Spawning Invincibility
- Part 16 - Battle City in Unity Part 16 : Exploding Tank animation
- Part 17 - Battle City in Unity Part 17 : Score Calculation
- Part 18 - Battle City in Unity Part 18 : Battle Status Board
- Part 19 - Battle City in Unity Part 19 : Bonus Crates - Generation
- Part 20 - Battle City in Unity Part 20 : Bonus Crates - Tank Extra Live
- Part 21 - Battle City in Unity Part 21 : Bonus Crates - Tank Invincibility
- Part 22 - Battle City in Unity Part 22 : Bonus Crates - Grenade
- Part 23 - Battle City in Unity Part 23 : Bonus Crates - Stopwatch
- Part 24 - Battle City in Unity Part 24 : Bonus Crates - Level Up
- Part 25 - Battle City in Unity Part 25 : Bonus Crates - Shovel
One of the critical roles of the GamePlayManager is to trigger the Spawning of enemies and Player(The actual spawning is done by the spawn point). Being the manager means it gets to choose where and when to spawn. To be able to decide where to spawn, it will need to know where are the spawn points.
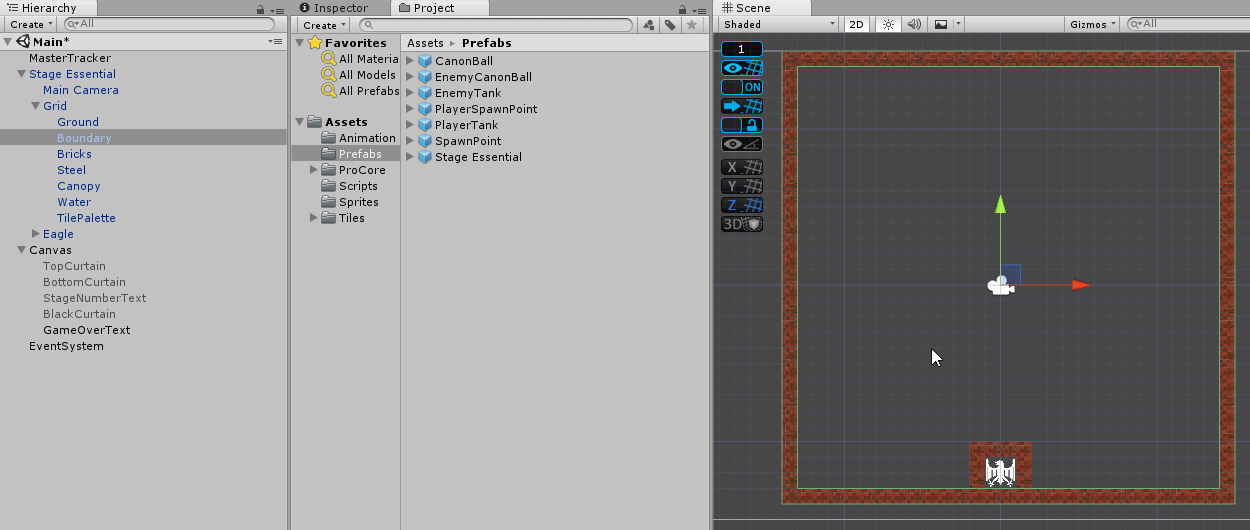
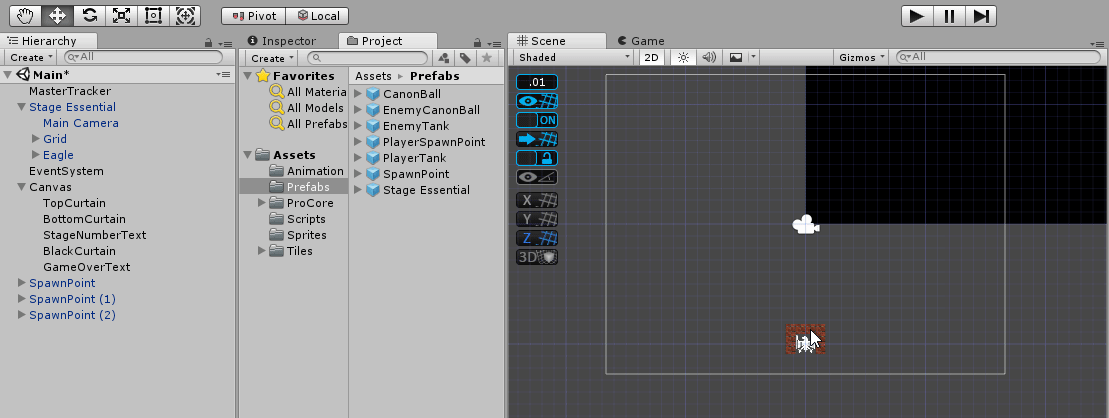
Let’s start with the prefab of SpawnPoint and PlayerSpawnPoint which we created at the end of Recreate Battle City in Unity Part 10: The Spawn. Create and assign a tag for the SpawnPoint prefab called

Now let’s get back to the
GameObject[] spawnPoints, spawnPlayerPoints;
void Start()
{
spawnPoints = GameObject.FindGameObjectsWithTag("EnemySpawnPoint");
spawnPlayerPoints = GameObject.FindGameObjectsWithTag("PlayerSpawnPoint");
//earlier codes are omitted for focus
}
How to trigger the Spawn
Now we have the references to the Spawn Points. Let’s write the code for triggering the spawning.
We start off with the spawning of enemies. Create a routine
if (LevelManager.smallTanks + LevelManager.fastTanks + LevelManager.bigTanks + LevelManager.armoredTanks > 0)Next, we need to choose the SpawnPoint. We do that by randomize choosing one of the elements of the array of SpawnPoint GameObject and then trigger the Animator variable
public void SpawnEnemy()
{
    if (LevelManager.smallTanks + LevelManager.fastTanks + LevelManager.bigTanks + LevelManager.armoredTanks > 0)
    {
        int spawnPointIndex = Random.Range(0, spawnPoints.Length);
        Animator anime = spawnPoints[spawnPointIndex].GetComponent<Animator>();
        anime.SetTrigger("Spawning");
    }
}
Now let’s test it out!
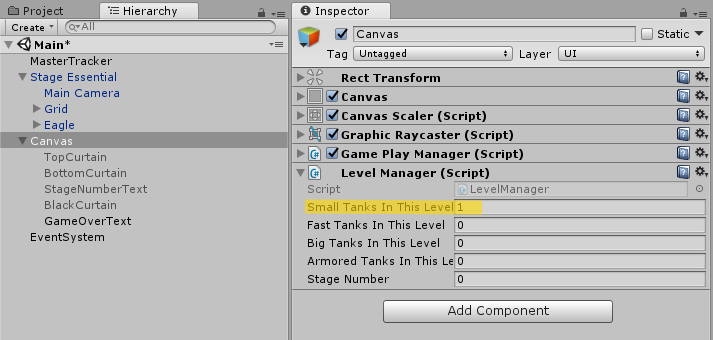
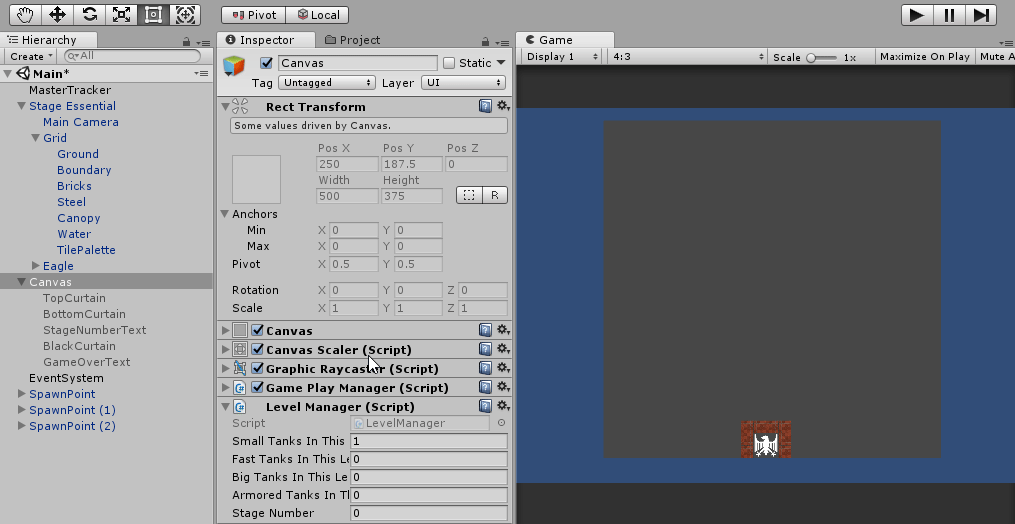
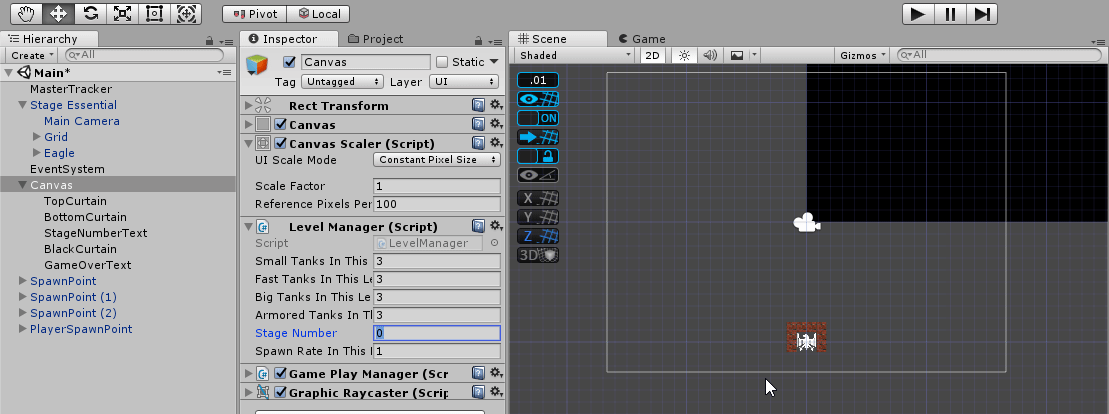
- Set value of 1 to the smallTankInThisLevel in the LevelManager Component of Canvas
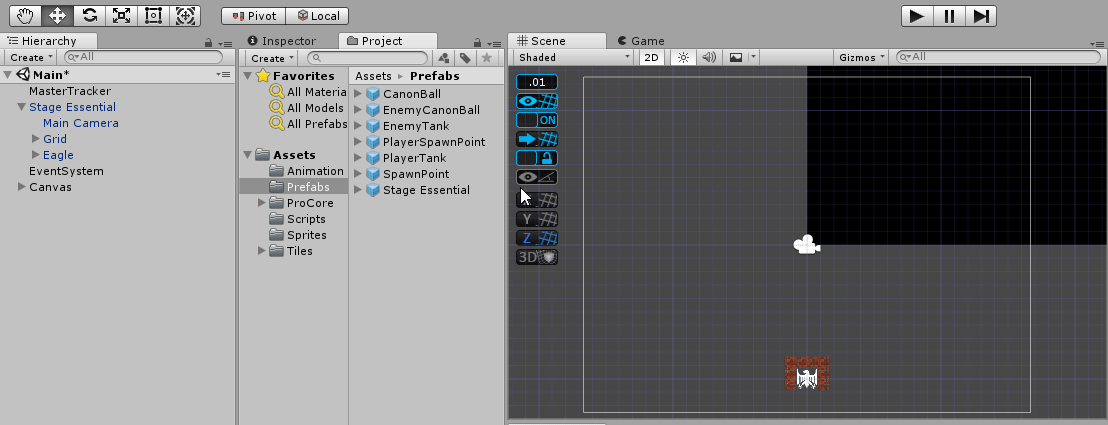
- Drag and drop some SpawnPoint prefabs onto the Hierarchy. Make sure it is within the game play area.
- Add the SpawnEnemy routine to the StartStage coroutine ensuring it is triggered after the curtain raiser sequence by adding a yield return null
IEnumerator StartStage()
{
    StartCoroutine(RevealStageNumber());
    yield return new WaitForSeconds(5);
    StartCoroutine(RevealTopStage());
    StartCoroutine(RevealBottomStage());
    yield return null;
    SpawnEnemy();
}- Update the Start Monobehaviour as below.
void Start ()
{
    spawnPoints = GameObject.FindGameObjectsWithTag("EnemySpawnPoint");
    spawnPlayerPoints = GameObject.FindGameObjectsWithTag("PlayerSpawnPoint");
    StartCoroutine(StartStage());
}- Enable back all the Canvas UI elements if you have disabled it earlier. Now start playing! Play it a few times to ensure it spawns randomly at different Spawn Points.
Continuous Spawning
So now we can spawn, but we need to keep spawning until we run out of enemies. We will be using a routine called InvokeRepeating to the SpawnEnemy routine.
Let’s update the StartStage coroutine to make the changes.
IEnumerator StartStage()
{
    StartCoroutine(RevealStageNumber());
    yield return new WaitForSeconds(5);
    StartCoroutine(RevealTopStage());
    StartCoroutine(RevealBottomStage());
    yield return null;
    InvokeRepeating("SpawnEnemy", 5, 5); //changed to InvokeRepeating
}I decided to add set the Spawn frequency as a Static variable from LevelManager so that we can change it from the LevelManager the speed of the spawn.
So update the LevelManager Script as below.
[SerializeField]
int smallTanksInThisLevel, fastTanksInThisLevel, bigTanksInThisLevel, armoredTanksInThisLevel, stageNumber;
public static int smallTanks, fastTanks, bigTanks, armoredTanks;
[SerializeField]
float spawnRateInThisLevel=5;       //newly added
public static float spawnRate { get; private set; } //newly added
private void Awake()
{
    MasterTracker.stageNumber = stageNumber;
    smallTanks = smallTanksInThisLevel;
    fastTanks = fastTanksInThisLevel;
    bigTanks = bigTanksInThisLevel;
    armoredTanks = armoredTanksInThisLevel;
    spawnRate = spawnRateInThisLevel; //newly added
}
Then update the InvokeRepeating for SpawnEnemy to the below.
InvokeRepeating("SpawnEnemy", LevelManager.spawnRate, LevelManager.spawnRate);Stop Spawning
Once the enemy exhausted its reserve of tanks, we will need to stop the spawning. We will do this in the SpawnEnemy routine itself where we have an “if” statement to see if there are any more enemy tanks left. We will add a CancelInvoke command to the “else” portion of the statement.
void SpawnEnemy()
{
    if (LevelManager.smallTanks + LevelManager.fastTanks + LevelManager.bigTanks + LevelManager.armoredTanks > 0)
    {
        int spawnPointIndex = Random.Range(0, spawnPoints.Length);
        anime = spawnPoints[spawnPointIndex].GetComponent<Animator>();
        anime.SetTrigger("Spawning");
    }
    else
    {
        CancelInvoke();
    }
}
Which enemy tank type to spawn
We can now spawn tanks continuously. But each stage has their own varying number of different tank types to spawn. If LevelManager states that there are only 10 small tanks, we must be able to stop spawning small tanks. Instead, we should be spawning the other types that still have in reserve.
The honor of doing this job will be handled by the Spawner itself as it is the one picking from random which tank to spawn.
We will be using something similar to the RandomDirection routine where we add the direction that has no blocking to a list before asking the computer to pick 1 from the list randomly .
This time we will add the type of tank that still has quantity in reserve based on the number of each of the tank type left to be spawned to a list(i called it
So let’s head to the Spawner script. First, we need to have an enum with each tank type for easy identification.
enum tankType
{
    smallTank, fastTank, bigTank, armoredTank
};Then we can check with the
List<int> tankToSpawn = new List<int>();
tankToSpawn.Clear();
if (LevelManager.smallTanks > 0) tankToSpawn.Add((int)tankType.smallTank);
if (LevelManager.fastTanks > 0) tankToSpawn.Add((int)tankType.fastTank);
if (LevelManager.bigTanks > 0) tankToSpawn.Add((int)tankType.bigTank);
if (LevelManager.armoredTanks > 0) tankToSpawn.Add((int)tankType.armoredTa
Then we can ask Skynet to randomly pick from the list the tank type it still can spawn.
int tankID = tankToSpawn[Random.Range(0, tankToSpawn.Count)];
tank = Instantiate(tanks[tankID], transform.position, transform.rotation);
Of course, we will later need to deduct the tank spawned from its reserve.
if (tankID == (int)tankType.smallTank) LevelManager.smallTanks--;
else if (tankID == (int)tankType.fastTank) LevelManager.fastTanks--;
else if (tankID == (int)tankType.bigTank) LevelManager.bigTanks--;
else if (tankID == (int)tankType.armoredTank) LevelManager.armoredTanks--;
We also need to ensure the above code will only be for the enemy’s spawn point. So we need to check the
using System.Collections;
using System.Collections.Generic;
using UnityEngine;

public class Spawner : MonoBehaviour
{
    GameObject[] tanks;
    GameObject tank;
    [SerializeField]
    bool isPlayer;
    [SerializeField]
    GameObject smallTank, fastTank, bigTank, armoredTank;
    enum tankType
    {
        smallTank, fastTank, bigTank, armoredTank
    };
    private void Start()
    {
        if (isPlayer)
        {
            tanks = new GameObject[1] { smallTank };
        }
        else
        {
            tanks = new GameObject[4] { smallTank, fastTank, bigTank, armoredTank };
        }
    }
    public void StartSpawning(){
        if (!isPlayer)
        {
            List<int> tankToSpawn = new List<int>();
            tankToSpawn.Clear();
            if (LevelManager.smallTanks > 0) tankToSpawn.Add((int)tankType.smallTank);
            if (LevelManager.fastTanks > 0) tankToSpawn.Add((int)tankType.fastTank);
            if (LevelManager.bigTanks > 0) tankToSpawn.Add((int)tankType.bigTank);
            if (LevelManager.armoredTanks > 0) tankToSpawn.Add((int)tankType.armoredTank);
            int tankID = tankToSpawn[Random.Range(0, tankToSpawn.Count)];
            tank = Instantiate(tanks[tankID], transform.position, transform.rotation);
            if (tankID == (int)tankType.smallTank) LevelManager.smallTanks--;
            else if (tankID == (int)tankType.fastTank) LevelManager.fastTanks--;
            else if (tankID == (int)tankType.bigTank) LevelManager.bigTanks--;
            else if (tankID == (int)tankType.armoredTank) LevelManager.armoredTanks--;
        }
        else
        {
            tank = Instantiate(tanks[0], transform.position, transform.rotation);
        }
    }
    public void SpawnNewTank()
    {
        if (tank != null) tank.SetActive(true);
    }
}
Let’s test out the spawning of enemies again. Add 3 SpawnPoint prefabs to the hierarchy, make sure they are in the gameplay area. Go to the Canvas GameObject under the Level Manager (Script) component in the Inspector and key in 3 each for small, fast, big, and armored tanks and set the Spawn Rate to 1.
What about the player?
Oops, we forget about the player. The code is relatively similar to that of SpawnEnemy. It is simpler as there is only 1 spawn point so we do not need to randomly pick a location for it. Similar to SpawnEnemy, we will do a check on MasterTracker’s playerLives to ensure it is not zero before we can allow the spawning. If it is zero, then it is GAME OVER! If we trigger the spawning of player, we will also need to deduct it from the playerLives other than when it is spawning the player tank at the start of the stage. So we need to declare a boolean called
bool stageStart = false;
void Start(){
    stageStart = true;
    //earlier codes are omitted for focus
}

public void SpawnPlayer()
{
    if (MasterTracker.playerLives > 0)
    {
        if (!stageStart)
        {
        MasterTracker.playerLives--;
        }
        stageStart = false;
        anime = spawnPlayerPoints[0].GetComponent<Animator>();
        anime.SetTrigger("Spawning");
    }else
    {
        StartCoroutine(GameOver())
    }
}
Add to the StartStage Coroutine as well to spawn the player’s tank at the beginning of the stage.
IEnumerator StartStage()
{
    StartCoroutine(RevealStageNumber());
    yield return new WaitForSeconds(5);
    StartCoroutine(RevealTopStage());
    StartCoroutine(RevealBottomStage());
    yield return null;
    InvokeRepeating("SpawnEnemy", LevelManager.spawnRate, LevelManager.spawnRate);
    SpawnPlayer();
}
Let’s head back to the Health Script’s
void Death()
{
    GamePlayManager GPM = GameObject.Find("Canvas").GetComponent<GamePlayManager>(); //newly added
    if (gameObject.CompareTag("Player"))
    {
        GPM.SpawnPlayer(); //Spawn Player
    }else{
        if (gameObject.CompareTag("Small")) MasterTracker.smallTankDestroyed++;
        else if (gameObject.CompareTag("Fast")) MasterTracker.fastTankDestroyed++;
        else if (gameObject.CompareTag("Big")) MasterTracker.bigTankDestroyed++;
        else if (gameObject.CompareTag("Armored")) MasterTracker.armoredTankDestroyed++;
    }
    Destroy(gameObject);
}Now Let’s try to test the game again, with a PlayerSpawnPoint as well. I will try to beat the breakneck spawn speed enemies with my 3 lives and see who lives to tell about it. Bring it on, Skynet!
Ok I lost. Long Live SkyNet! At least my script works, for a consolation.
Fixing the Stage Number
OK I am fedup with the “New Text” word appearing at the start of stage. So let’s make it show the Stage Number. Add the below to the first line of the Start Monobehaviour.
stageNumberText.text = "STAGE " + MasterTracker.stageNumber.ToString();Update the Canvas’s LevelManager component’s Stage Number to 1. And press play. Phew! One eyesore resolved.
That’s all for Spawning part of GamePlayManager. Next we will move on to how do we clear the stage.
This article is Part 13 in a 25-Part Series.
- Introduction - Battle City in Unity Prequel
- Part 1 - Battle City in Unity Part l: Single(ton) Sole Survivor
- Part 2 - Battle City in Unity Part 2: Level Creation using Tilemaps
- Part 3 - Battle City in Unity Part 3: Creation of the Protagonist and Antagonists(Tanks)
- Part 4 - Battle City in Unity Part 4: Tank Movement
- Part 5 - Battle City in Unity Part 5: Player Controller
- Part 6 - Battle City in Unity Part 6: Enemy AI
- Part 7 - Battle City in Unity Part 7: Creating Projectiles
- Part 8 - Battle City in Unity Part 8: Hurting the tanks
- Part 9 - Battle City in Unity Part 9: Firing the shots
- Part 10 - Battle City in Unity Part 10: The Spawn
- Part 11 - Battle City in Unity Part 11 : The Gamemaker - Starting the Stage and Game Over
- Part 12 - Battle City in Unity Part 12 : Level Manager
- Part 13 - This Article
- Part 14 - Battle City in Unity Part 14 : The Gamemaker - Stage Cleared or Game Over
- Part 15 - Battle City in Unity Part 15 : Spawning Invincibility
- Part 16 - Battle City in Unity Part 16 : Exploding Tank animation
- Part 17 - Battle City in Unity Part 17 : Score Calculation
- Part 18 - Battle City in Unity Part 18 : Battle Status Board
- Part 19 - Battle City in Unity Part 19 : Bonus Crates - Generation
- Part 20 - Battle City in Unity Part 20 : Bonus Crates - Tank Extra Live
- Part 21 - Battle City in Unity Part 21 : Bonus Crates - Tank Invincibility
- Part 22 - Battle City in Unity Part 22 : Bonus Crates - Grenade
- Part 23 - Battle City in Unity Part 23 : Bonus Crates - Stopwatch
- Part 24 - Battle City in Unity Part 24 : Bonus Crates - Level Up
- Part 25 - Battle City in Unity Part 25 : Bonus Crates - Shovel

