Battle City in Unity Part 2: Level Creation using Tilemaps
This article is Part 2 in a 25-Part Series.
- Introduction - Battle City in Unity Prequel
- Part 1 - Battle City in Unity Part l: Single(ton) Sole Survivor
- Part 2 - This Article
- Part 3 - Battle City in Unity Part 3: Creation of the Protagonist and Antagonists(Tanks)
- Part 4 - Battle City in Unity Part 4: Tank Movement
- Part 5 - Battle City in Unity Part 5: Player Controller
- Part 6 - Battle City in Unity Part 6: Enemy AI
- Part 7 - Battle City in Unity Part 7: Creating Projectiles
- Part 8 - Battle City in Unity Part 8: Hurting the tanks
- Part 9 - Battle City in Unity Part 9: Firing the shots
- Part 10 - Battle City in Unity Part 10: The Spawn
- Part 11 - Battle City in Unity Part 11 : The Gamemaker - Starting the Stage and Game Over
- Part 12 - Battle City in Unity Part 12 : Level Manager
- Part 13 - Battle City in Unity Part 13 : The Gamemaker - Spawning
- Part 14 - Battle City in Unity Part 14 : The Gamemaker - Stage Cleared or Game Over
- Part 15 - Battle City in Unity Part 15 : Spawning Invincibility
- Part 16 - Battle City in Unity Part 16 : Exploding Tank animation
- Part 17 - Battle City in Unity Part 17 : Score Calculation
- Part 18 - Battle City in Unity Part 18 : Battle Status Board
- Part 19 - Battle City in Unity Part 19 : Bonus Crates - Generation
- Part 20 - Battle City in Unity Part 20 : Bonus Crates - Tank Extra Live
- Part 21 - Battle City in Unity Part 21 : Bonus Crates - Tank Invincibility
- Part 22 - Battle City in Unity Part 22 : Bonus Crates - Grenade
- Part 23 - Battle City in Unity Part 23 : Bonus Crates - Stopwatch
- Part 24 - Battle City in Unity Part 24 : Bonus Crates - Level Up
- Part 25 - Battle City in Unity Part 25 : Bonus Crates - Shovel
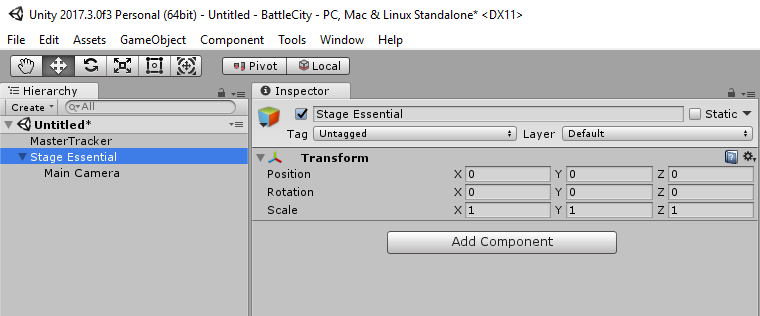
One Game Object to rule them all
Create an empty Game Object and name it
Next,
Move the
Tilemap Preparation
The main reason I choose Battle City as my first retro game to recreate is because of the new Tilemap feature which was only introduced in Unity in late 2017. As it is still new, there is still lack of information on it so using it allows me to familiarize with it as I believe it is a very powerful tool to aid in 2D Game development. If you are unfamiliar with it, I suggest you to go through the tutorials from Unity for a start.
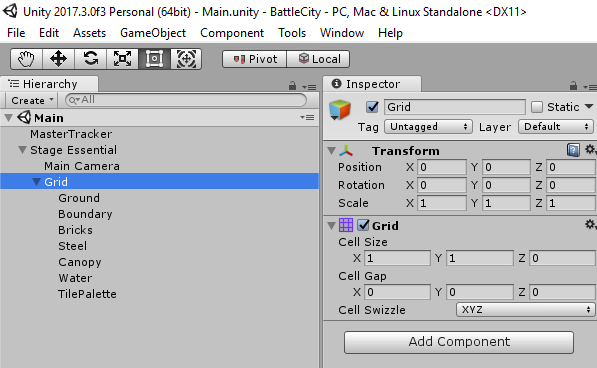
- Create a tilemap in the hierarchy from
2D Objects -> Tilemap . This will generate a Game Object calledGrid , and theTilemap will be a child to the Grid. The purpose of the Grid other than being a parent is acting as guides with gridlines of where the tiles will be painted. - Move the Grid and its child into Stage Essential.
- Rename the Tilemap as
Ground ; this will be used to place the tiles for the ground of the stage. - Create 6 more tilemaps renaming them as
Boundary, Bricks, Steel, Canopy, Water, and TilePalette .
At this point, your Hierarchy should look like the below.
Once the above is done, go to the individual tilemap you have created and change the
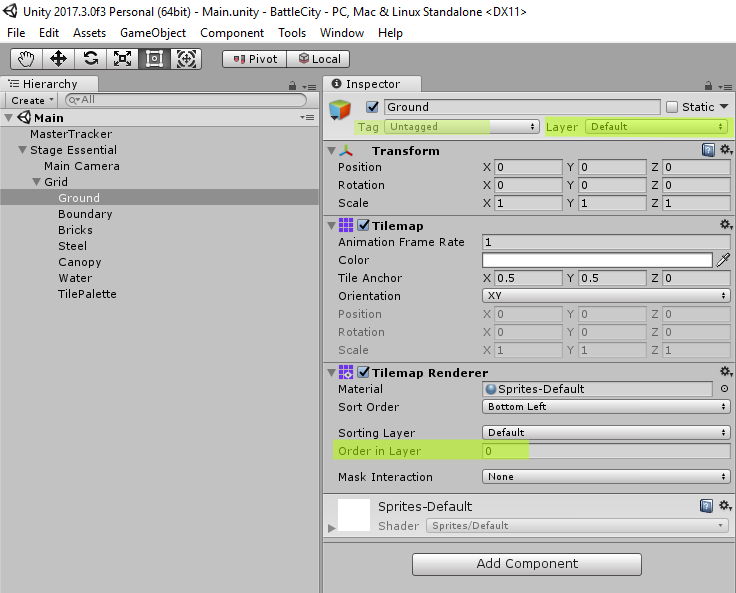
Set Order in Layer, Layer, and tag as below. If the layer or tag is not available for selection in the drop-down, you will need to create it.
| Tilemap Name | Order In Layer | Tag | Layer |
|---|---|---|---|
| Ground | -1 | Untagged | Default |
| Bricks | 0 (default) |
Brick | Brick |
| Steel | 0 (default) |
Steel | Boundary |
| Water | 0 (default) |
Untagged | Water |
| Canopy | 1 | Untagged | Default |
| Boundary | 0 (default) |
Untagged | Boundary |
| TilePalette | 0 (default) |
Untagged | Default |
Tile Palette Preparation
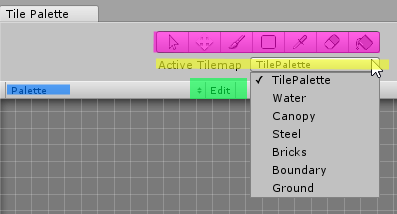
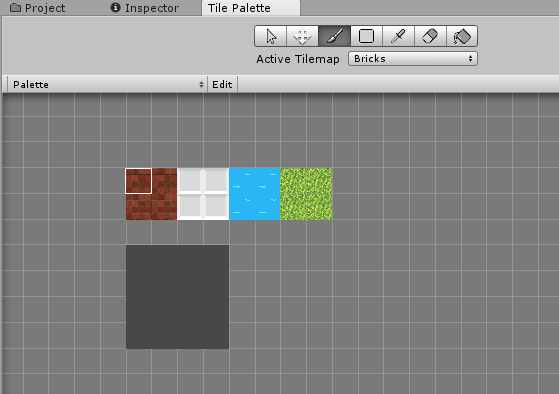
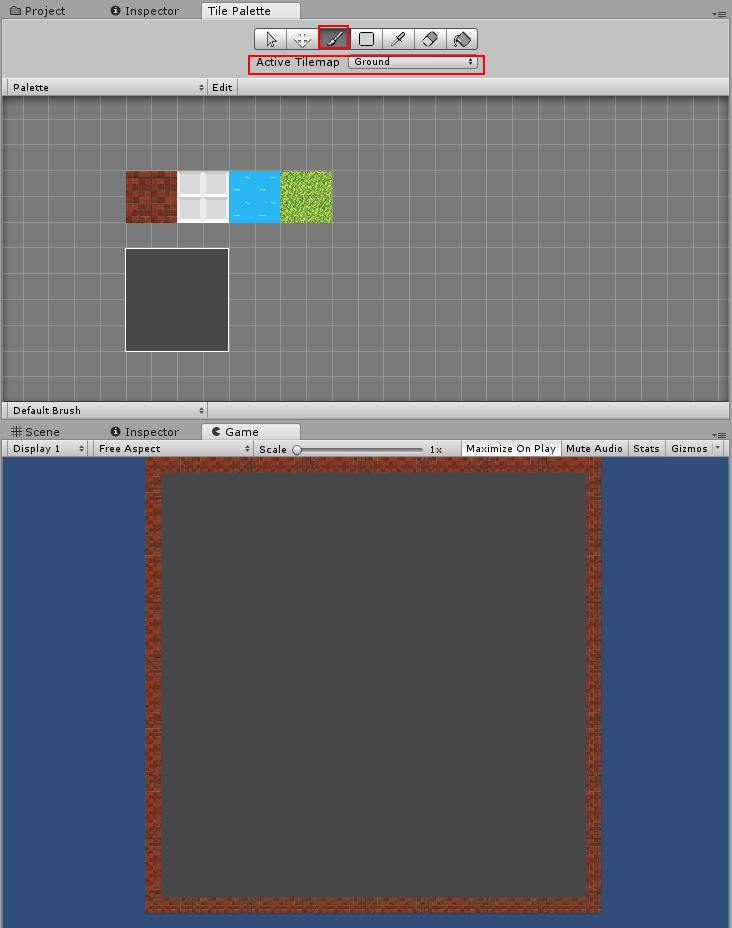
The next step is prepare the Tile Palette. a Tile Palette is a place where you gather different tiles to be painted on the Tilemap. To get to the Tile Palette, you will need to select
Purple highlight: The Palette that is in use. I have seen people using different palettes for organization purposes. For this project, there are only limited type of tiles in use so I will just stick to one Palette.
Yellow highlight: The Active Tilemap. This is probably the most important thing to pay attention to. For example if I paint a brick tile with the Steel Tilemap selected. It would result in a brick tile acting like a steel tile(remember the tilemaps are assigned different layers which I will be changing the Physics 2D setting to choose what they can collide with). Imagine you have painted for 10 minutes and you realize you used the wrong tilemap!
Pink highlight: Tools for actions that you can do on a tilemap or tile palette. These are generic paint actions of Select, Move, Paint, Fill, Color Picker, Eraser, Paint Large Area.
Green highlight: Where you will perform the actions of the tools. If the Edit is depressed, your actions can only be done on a Tile Palette. If Edit is not depressed, your actions can only be done on a Tilemap
Adding of tile to the palette is very straightforward. Just drag and drop an image from your project window to the Tile Palette.
Before you drag the image to the tile Palette, click on the image from the Project Window to access its
You can also use a sprite sheet to create a tile but remember to factor in the divison of pixels in Pixels per unit due to the sprite sheet splitting into individual sprites.
Once you drag and drop, Unity will prompt you to save the tile asset. Once the tile is shown on the Tile Palette, use the paintbrush and depress the Edit button and paint the tile on the Tile Palette to form a 2 by 2 Square tile. This is to shorten the time for painting the tiles in the tilemap as i would be able to paint 4 tiles at one go as opposed to one. You do not have to do this but i find that makes things more convenient. The end result I have on my tile palette is shown as below.
Painting the Boundary
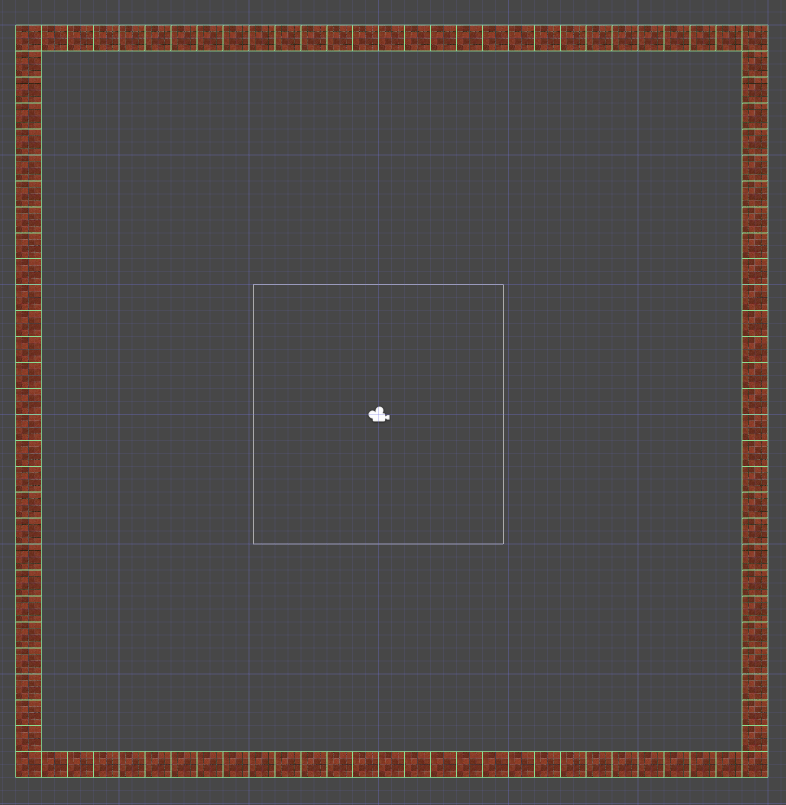
Now we are ready to start painting! We need to gather information about how big our game area needs to be. From what I gathered from Wikipedia, Battle City Game Map is a 13 X 13 map size. But we need to take into account the width of a tank takes up the width of two bricks or two steel. Rather than trying to make our tile shrink to 0.5 unit, we should make the tile as 1 unit thus expanding the game area by double. So our game area should be of 26 X 26 units. This will make it easier to calculate position as it will increment by 1 instead of 0.5.
The first thing we need to do is create the boundary which will be used to constrain the gameplay in the 26 X 26 units area.
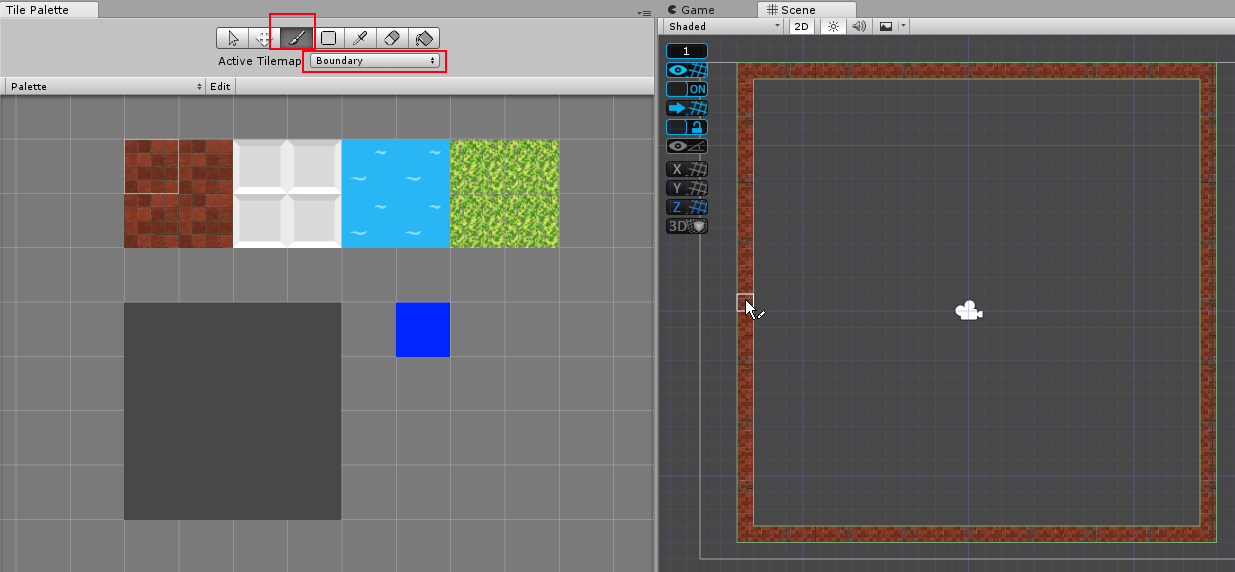
- Go to the tile palette and select the Active Tilemap as Boundary.
- Use the Select Tool from the Tile Palette(the icon that looks like the mouse arrow), use it to click on the grid in the Scene Window. The Inspector Window will change into the one for Grid Selection. Note the Position X and Y of the Grid Selection Inspector, continue to click and move your position on the Scene Window until it indicates -14 for Position X and -14 for Position Y. This is where the Boundary will be.
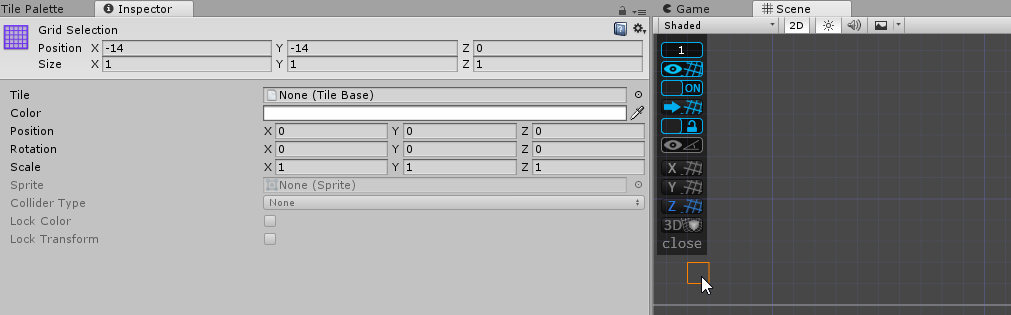
Once the correct position is selected, paint it with one of the tiles in the tile palette. Any tile is ok as it is just for visibility purposes. Do the same for the corners of -14,13 and 13,13 and 13,-14. Once you have painted the edges, paint to join the four corners forming a square which will be surrounding the game area.
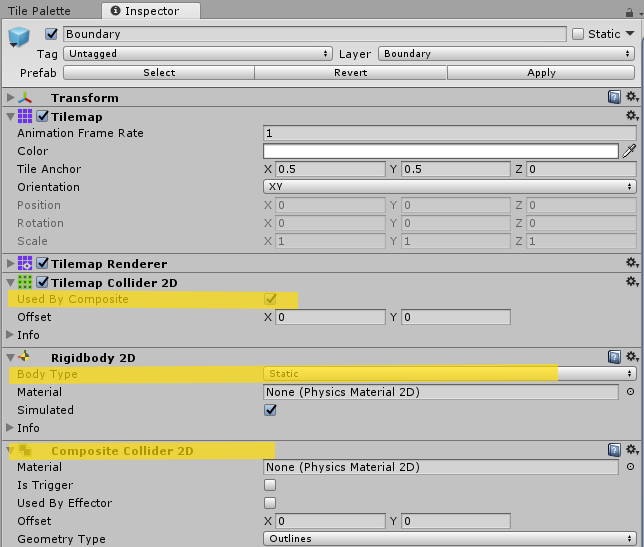
Once you have the boundary painted, select the Boundary Tilemap and add component
You would have noticed that the collider will form a highlighted structure around each of tile. The frames are the places where collider detection is present. In this case, there is no need for collider detection in the intersection between the painted tiles in Boundary Tilemap as nothing will be able to reach it without touching the entire frame collider detection, this represents wasted resources.
Instead, we can create a collider detection only at the frames of the entire boundary. To do this, add another component to the Boundary Tilemap’s Inspector Tile
You would have also noticed that upon adding the composite collider, Unity adds a Rigidbody 2D component to the Boundary Game Object as well. Set the Rigidbody 2D
So that concludes the Boundary Tilemap section.
Painting the Ground
This will be the easiest of the lot. Just change the
Painting the base
We will not be creating an entire stage this time. Instead we will just create the bare essential for the stage. Take a look at one of the stage, the only thing that is consistent in all the stages is the base (8 bricks surrounding the eagle).
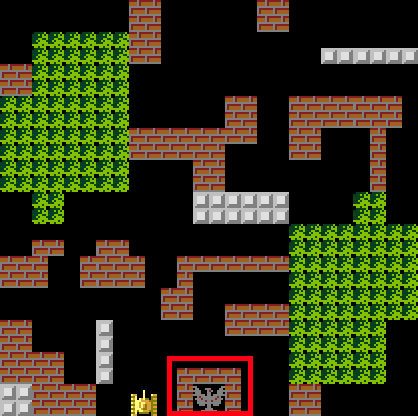
So all we need to do to create the eagle and its surrounding bricks to complete the painting.
For the eagle, I do not suggest creating it on tilemap because it has a unique condition of Game Over when collided with a tank bullet so you can’t use an existing tilemap to paint it and it is too much of overkill to create a tilemap just for this.
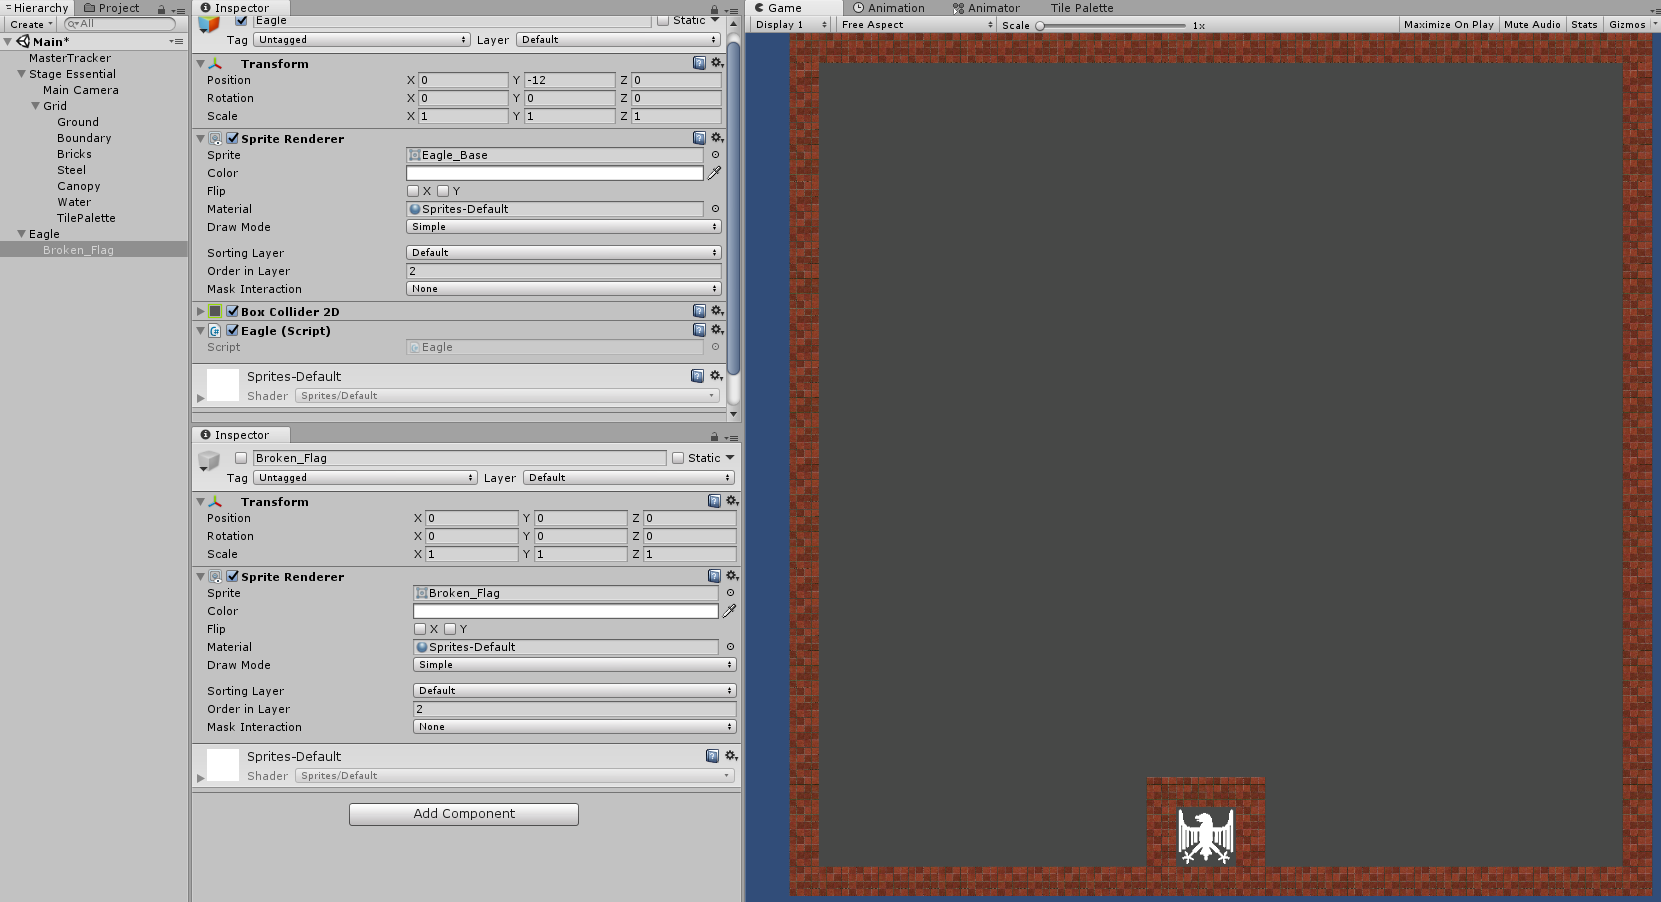
So what I will do is just create a Game Object with a Sprite to render the eagle. You will need to change its
Once you have the appropriate Pixel Per Unit, drag and drop the Sprite from your Project Window to the Hierarchy. Unity will create the Game Object with a Sprite Renderer component automatically. Rename the Game Object to Eagle.
Add the
Optional: You can create a broken flag Sprite and “child” it to the Eagle Game Object. Set it to disabled so that if the Eagle got destroyed by a tank bullet, you can just disable the Eagle Sprite Renderer and enable the child Broken flag Game Object (That is what is happening in Battle City).
Move the Eagle Game Object to the bottom Center of the Game Play Area.
Then draw the Brick Tiles around the Eagle(remember to change the Active Tilemap to Bricks. Nagging again). You should have something like the below.
Now select the Brick Tilemap from the Hierarchy and add a Tilemap Collider 2D component in its Inspector to make the bricks a collision candidate. You DO NOT need to add composite collider 2D as there will be scenarios where there will be only a single brick tile instead of a congregation of bricks together.
Adding the colliders
As all the tilemaps we are touching until now are the Ground, Boundary and Bricks. We have yet to use the Steel, Canopy, Water and TilePalette. I would want to add the necessary components(primarily
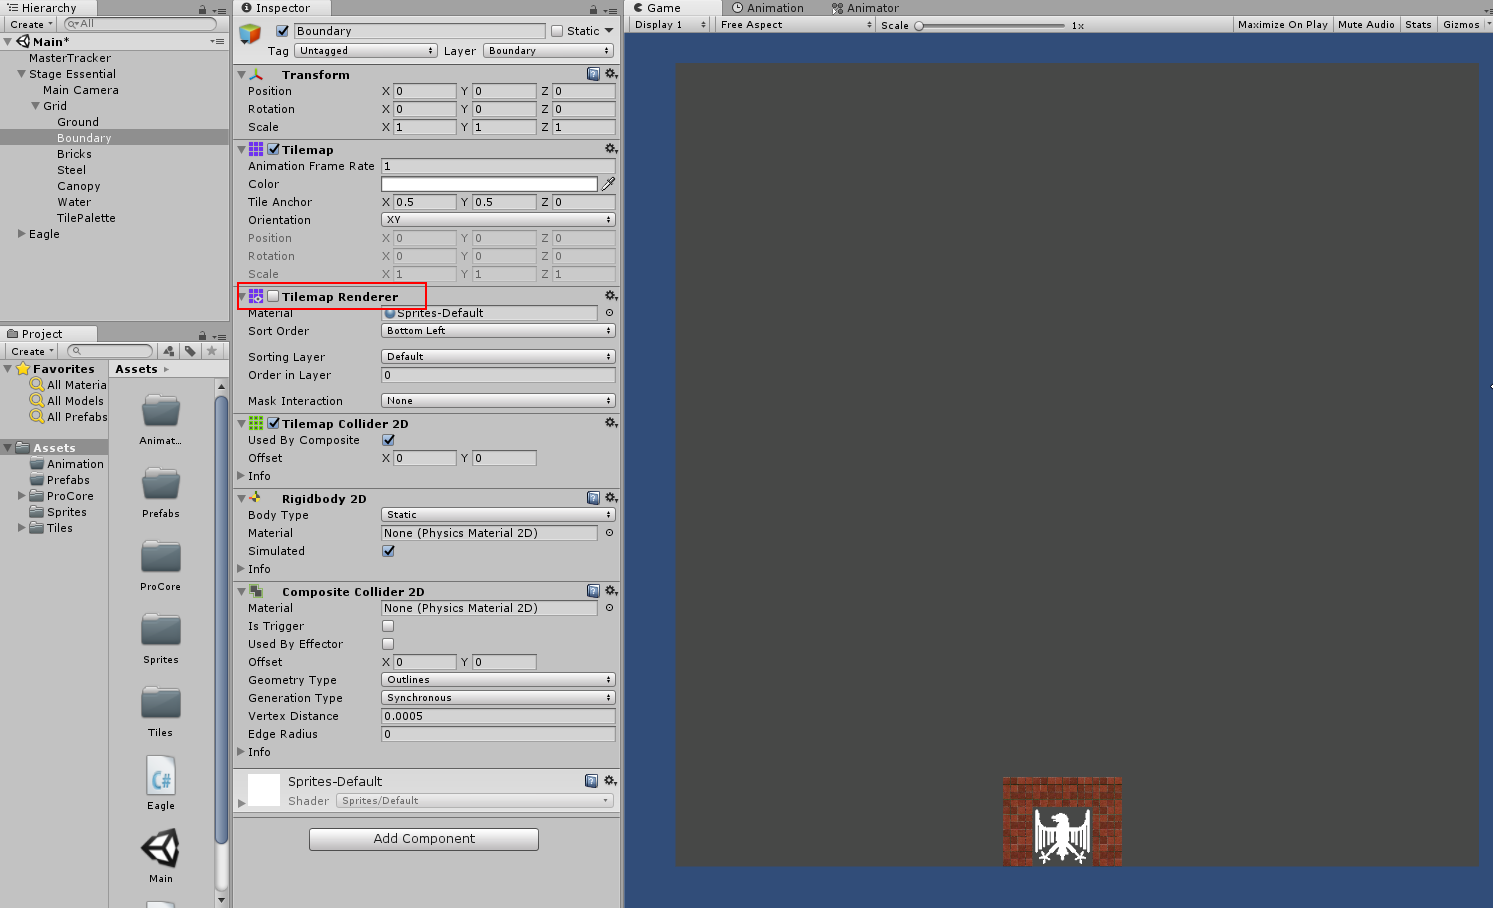
Getting rid of Boundaries
Now you have added the necessary components to your Tilemaps. You do not need the Boundary anymore! Select the Boundary Tilemap from the Hierarchy and uncheck the Tilemap Renderer and the Boundary will magically disappear leaving the collider to stop any objects from leaving the Gameplay area.
Become fab by making prefab
That should be all for the tilemap. The most important task now is not to save the scene, but to make this entire Scene a
Play the game! Not yet!
Now you can play the game. Sorry, just kidding. There is nothing to play. We are still missing the protagonist(the good guy tank) and antagonists(the villain tanks). We will talk about it in the next post.
This article is Part 2 in a 25-Part Series.
- Introduction - Battle City in Unity Prequel
- Part 1 - Battle City in Unity Part l: Single(ton) Sole Survivor
- Part 2 - This Article
- Part 3 - Battle City in Unity Part 3: Creation of the Protagonist and Antagonists(Tanks)
- Part 4 - Battle City in Unity Part 4: Tank Movement
- Part 5 - Battle City in Unity Part 5: Player Controller
- Part 6 - Battle City in Unity Part 6: Enemy AI
- Part 7 - Battle City in Unity Part 7: Creating Projectiles
- Part 8 - Battle City in Unity Part 8: Hurting the tanks
- Part 9 - Battle City in Unity Part 9: Firing the shots
- Part 10 - Battle City in Unity Part 10: The Spawn
- Part 11 - Battle City in Unity Part 11 : The Gamemaker - Starting the Stage and Game Over
- Part 12 - Battle City in Unity Part 12 : Level Manager
- Part 13 - Battle City in Unity Part 13 : The Gamemaker - Spawning
- Part 14 - Battle City in Unity Part 14 : The Gamemaker - Stage Cleared or Game Over
- Part 15 - Battle City in Unity Part 15 : Spawning Invincibility
- Part 16 - Battle City in Unity Part 16 : Exploding Tank animation
- Part 17 - Battle City in Unity Part 17 : Score Calculation
- Part 18 - Battle City in Unity Part 18 : Battle Status Board
- Part 19 - Battle City in Unity Part 19 : Bonus Crates - Generation
- Part 20 - Battle City in Unity Part 20 : Bonus Crates - Tank Extra Live
- Part 21 - Battle City in Unity Part 21 : Bonus Crates - Tank Invincibility
- Part 22 - Battle City in Unity Part 22 : Bonus Crates - Grenade
- Part 23 - Battle City in Unity Part 23 : Bonus Crates - Stopwatch
- Part 24 - Battle City in Unity Part 24 : Bonus Crates - Level Up
- Part 25 - Battle City in Unity Part 25 : Bonus Crates - Shovel

