Battle City in Unity Part 14 : The Gamemaker - Stage Cleared or Game Over
This article is Part 14 in a 25-Part Series.
- Introduction - Battle City in Unity Prequel
- Part 1 - Battle City in Unity Part l: Single(ton) Sole Survivor
- Part 2 - Battle City in Unity Part 2: Level Creation using Tilemaps
- Part 3 - Battle City in Unity Part 3: Creation of the Protagonist and Antagonists(Tanks)
- Part 4 - Battle City in Unity Part 4: Tank Movement
- Part 5 - Battle City in Unity Part 5: Player Controller
- Part 6 - Battle City in Unity Part 6: Enemy AI
- Part 7 - Battle City in Unity Part 7: Creating Projectiles
- Part 8 - Battle City in Unity Part 8: Hurting the tanks
- Part 9 - Battle City in Unity Part 9: Firing the shots
- Part 10 - Battle City in Unity Part 10: The Spawn
- Part 11 - Battle City in Unity Part 11 : The Gamemaker - Starting the Stage and Game Over
- Part 12 - Battle City in Unity Part 12 : Level Manager
- Part 13 - Battle City in Unity Part 13 : The Gamemaker - Spawning
- Part 14 - This Article
- Part 15 - Battle City in Unity Part 15 : Spawning Invincibility
- Part 16 - Battle City in Unity Part 16 : Exploding Tank animation
- Part 17 - Battle City in Unity Part 17 : Score Calculation
- Part 18 - Battle City in Unity Part 18 : Battle Status Board
- Part 19 - Battle City in Unity Part 19 : Bonus Crates - Generation
- Part 20 - Battle City in Unity Part 20 : Bonus Crates - Tank Extra Live
- Part 21 - Battle City in Unity Part 21 : Bonus Crates - Tank Invincibility
- Part 22 - Battle City in Unity Part 22 : Bonus Crates - Grenade
- Part 23 - Battle City in Unity Part 23 : Bonus Crates - Stopwatch
- Part 24 - Battle City in Unity Part 24 : Bonus Crates - Level Up
- Part 25 - Battle City in Unity Part 25 : Bonus Crates - Shovel
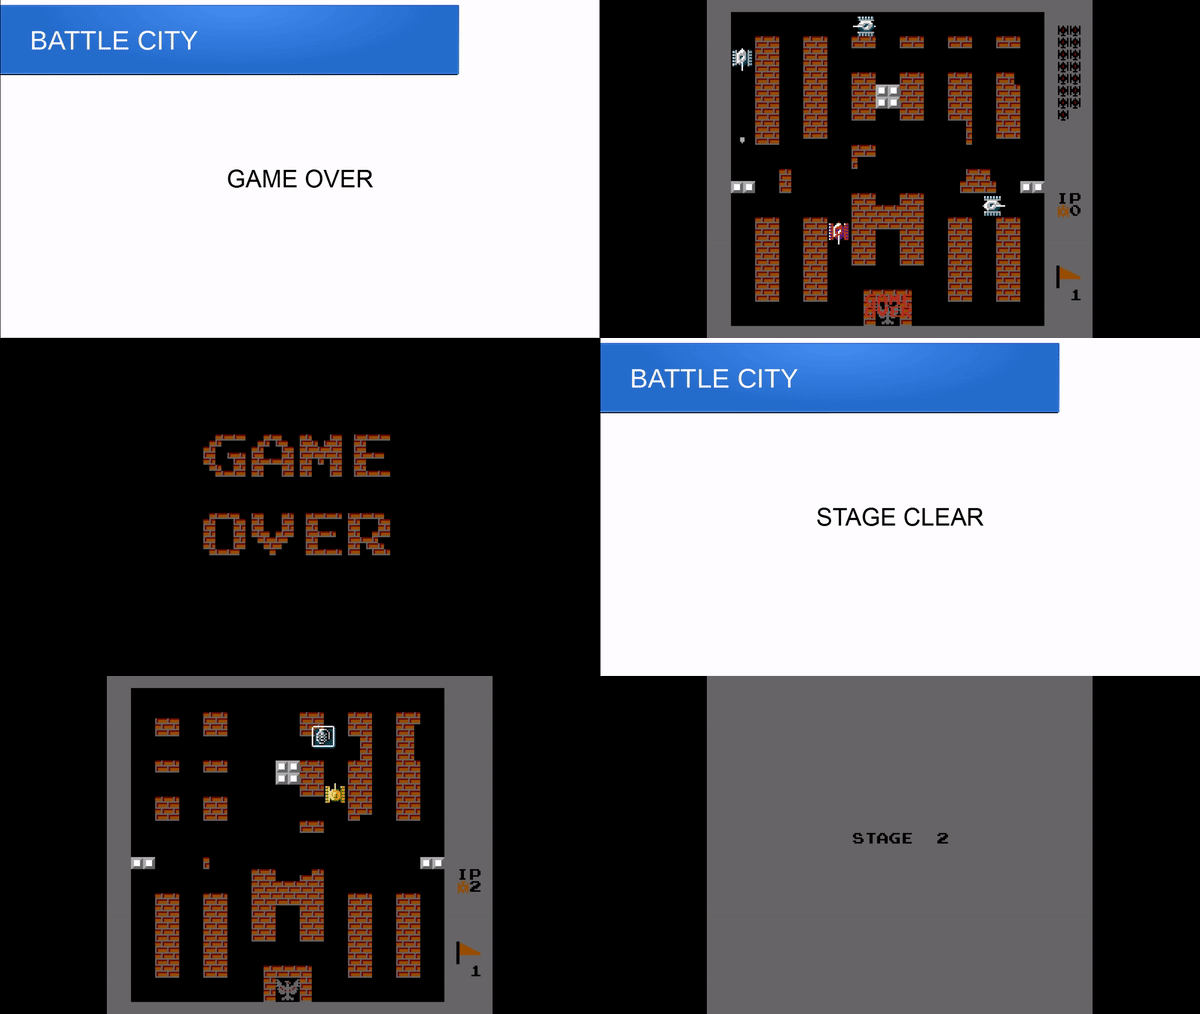
Let’s look at what happened during Game Over or Stage Clear.(with fast fwd enabled)

We can see that both Stage Clear and Game Over goes to the same scene for Score Calculation but Game Over shows a massive Game Over sign after while the Stage Clear goes to next stage. So there must be a means to tell the Score Calculation Scene that it is a Game Over or a Stage Clear scenario.
The best way to do that will be at the
Add the below to the MasterTracker’s variable declaration
public static bool stageCleared = false;We can now go to the
bool tankReserveEmpty = false;
void SpawnEnemy()
{
    if (LevelManager.smallTanks + LevelManager.fastTanks + LevelManager.bigTanks + LevelManager.armoredTanks > 0)
    {
        int spawnPointIndex = Random.Range(0, spawnPoints.Length);
        Animator anime = spawnPoints[spawnPointIndex].GetComponent<Animator>();
        anime.SetTrigger("Spawning");
    }
    else
    {
        CancelInvoke();
        tankReserveEmpty = true;
    }
}
Then at the Update Monobehaviour routine, we can check if the tankReserveEmpty flag is set and there are no more enemy tanks in the scene(using GameObject.FindWithTag). If the check is true, set MasterTracker’s stageCompleted to true and trigger a routine
using UnityEngine.SceneManagement;

private void Update()
{
    if (tankReserveEmpty && GameObject.FindWithTag("Small") == null && GameObject.FindWithTag("Fast") == null && GameObject.FindWithTag("Big") == null && GameObject.FindWithTag("Armored") == null)
    {
    	MasterTracker.stageCleared = true;
        LevelCompleted();
    }
}
private void LevelCompleted()
{
    tankReserveEmpty = false;
    SceneManager.LoadScene("Score");
}
We can also code in the GameOver portion at the GameOver coroutine. The only update we need to do is set MasterTracker’s stageCleared to false and trigger the LevelCompleted routine at the end.
IEnumerator GameOver()
{
    while (gameOverText.rectTransform.localPosition.y < 0)
    {
        gameOverText.rectTransform.localPosition = new Vector3(gameOverText.rectTransform.localPosition.x, gameOverText.rectTransform.localPosition.y + 40f * Time.deltaTime, gameOverText.rectTransform.localPosition.z);
        yield return null;
    }
    MasterTracker.stageCleared = false;
    LevelCompleted();
}
Game Over when Eagle is destroyed
There is still one more Game Over scenario left: When the eagle is destroyed. Let’s head to the script
private void OnCollisionEnter2D(Collision2D collision)
{
    if (collision.gameObject.CompareTag("EnemyProjectile") || collision.gameObject.CompareTag("PlayerProjectile"))
    {
        GetComponent<SpriteRenderer>().enabled = false;
        transform.GetChild(0).gameObject.SetActive(true);
        GamePlayManager GPM = GameObject.Find("Canvas").GetComponent<GamePlayManager>();
        StartCoroutine(GPM.GameOver());
    }

}.
We need to assign tags to the
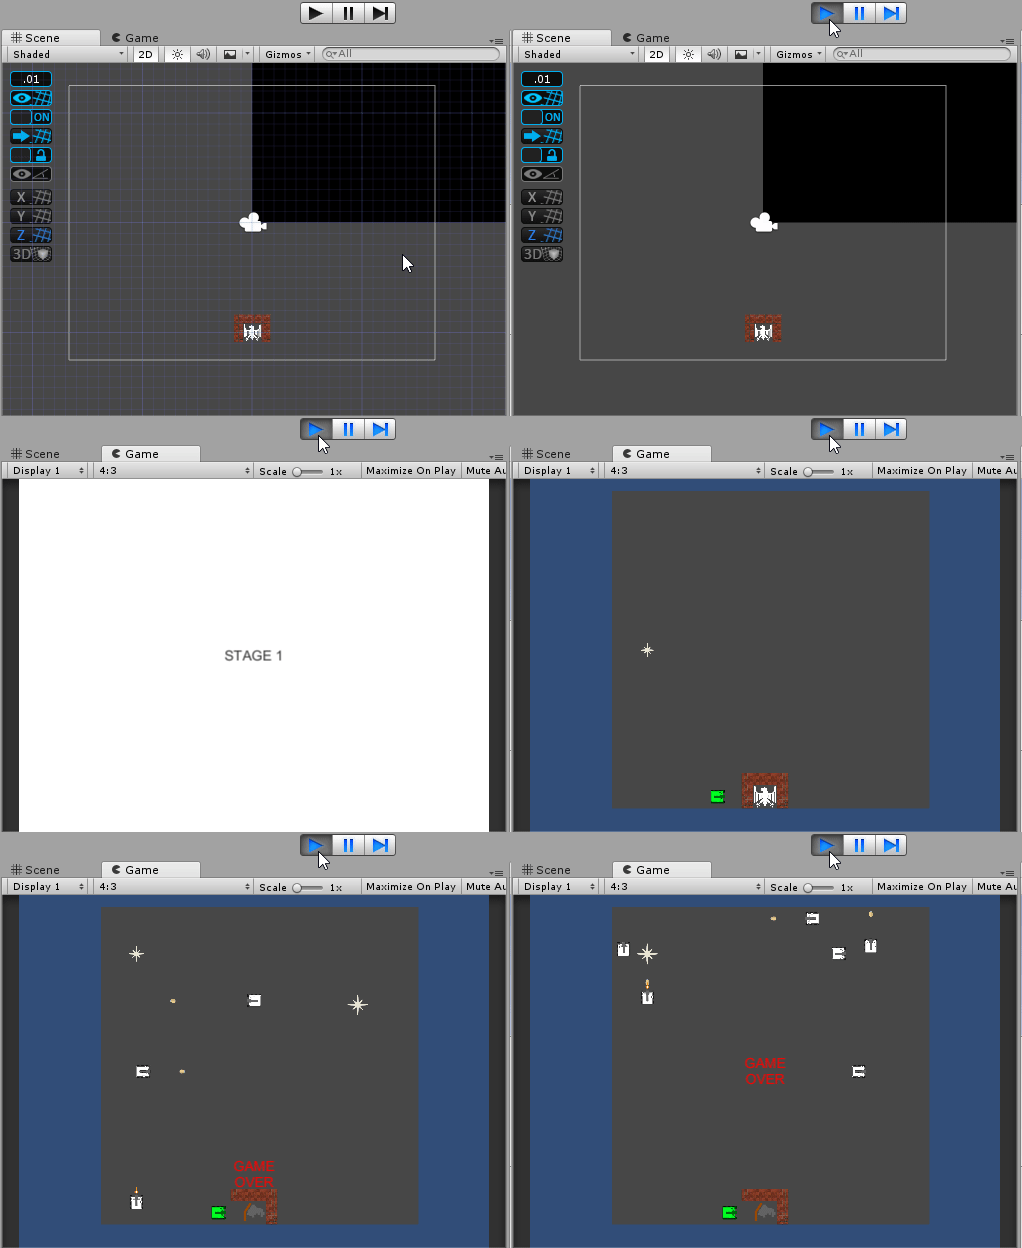
Let’s test out the Eagle Destruction Game Over Scenario now!

Hooray! It’s working, with some error at the end as it cannot find the Score Scene stated in the Code. We will create the Score Scene in the next post.
- Grab the SpawnPoint Game Objects on the Stage 1 Scene and place them inside the Stage Essential Game Object.
- Grab the PlayerSpawnPoint Game Object on the Stage 1 Scene and place it inside the Stage Essential Game Object.
- Grab the Canvas Game Object on the Stage 1 Scene and place it inside the Stage Essential Game Object.
- Move the SpawnPoints to the rightful location as per the Battle City Game. At the top left, top center and top right of the gameplay area.
- Move the PlayerSpawnPoint to the left of the leftmost brick surrounding the eagle.
- Now your scene should only have 2 game objects at its root. MasterTracker and Stage Essential(everything else is children to Stage Essential). Prefab the MasterTracker and Stage Essential replacing the old ones you have prefab previously.

Now you are able to create your own stage by dragging the prefab of Stage Essential and MasterTracker to a new scene! Try create a
This article is Part 14 in a 25-Part Series.
- Introduction - Battle City in Unity Prequel
- Part 1 - Battle City in Unity Part l: Single(ton) Sole Survivor
- Part 2 - Battle City in Unity Part 2: Level Creation using Tilemaps
- Part 3 - Battle City in Unity Part 3: Creation of the Protagonist and Antagonists(Tanks)
- Part 4 - Battle City in Unity Part 4: Tank Movement
- Part 5 - Battle City in Unity Part 5: Player Controller
- Part 6 - Battle City in Unity Part 6: Enemy AI
- Part 7 - Battle City in Unity Part 7: Creating Projectiles
- Part 8 - Battle City in Unity Part 8: Hurting the tanks
- Part 9 - Battle City in Unity Part 9: Firing the shots
- Part 10 - Battle City in Unity Part 10: The Spawn
- Part 11 - Battle City in Unity Part 11 : The Gamemaker - Starting the Stage and Game Over
- Part 12 - Battle City in Unity Part 12 : Level Manager
- Part 13 - Battle City in Unity Part 13 : The Gamemaker - Spawning
- Part 14 - This Article
- Part 15 - Battle City in Unity Part 15 : Spawning Invincibility
- Part 16 - Battle City in Unity Part 16 : Exploding Tank animation
- Part 17 - Battle City in Unity Part 17 : Score Calculation
- Part 18 - Battle City in Unity Part 18 : Battle Status Board
- Part 19 - Battle City in Unity Part 19 : Bonus Crates - Generation
- Part 20 - Battle City in Unity Part 20 : Bonus Crates - Tank Extra Live
- Part 21 - Battle City in Unity Part 21 : Bonus Crates - Tank Invincibility
- Part 22 - Battle City in Unity Part 22 : Bonus Crates - Grenade
- Part 23 - Battle City in Unity Part 23 : Bonus Crates - Stopwatch
- Part 24 - Battle City in Unity Part 24 : Bonus Crates - Level Up
- Part 25 - Battle City in Unity Part 25 : Bonus Crates - Shovel

