Files Deployment Using Powershell (Part 3): Link Them All Up

In the previous post, I have explained the individual code segments that makes this program tick. Now is the time to link them all up.
Name your program
In order to run your program, you will need to name it first. I am calling mine Appimpl (short for application implementation). The code would be something like the below:
function Appimpl {}We will need to declare this program as a function so that we can trigger the program by keying in the name in powershell. Between the opening and closing curly bracket are where all the code will be.
Start with the ingredients and user input
Immediately after naming your program. Add the ingredients and user input
$filename = @()
$objects=@()
do {
$input = Read-host “Input the filename [Hit Enter for last value]”
if ([string]::IsNullOrEmpty($input)){}
else{$filename += $input}
} until ([string]::IsNullOrEmpty($input))
$inputsource = Read-host “Input the source path “
$inputDestination = Read-host “Input the destination path “
Time Stamp the start of the deployment
One of the optional requirements is to get the start and end date time of the deployment. So when do we request for it? It will be when the actual copying of the files started, which will be immediately after the user inputs are completed. Thus next we will add the showing of the current date/time next.
Start of Deployment: '' +(get-date -format F).ToString() + [string][TimeZoneInfo]::Local.DisplayNameget-date is the powershell command to retrieve the current date time while specifying the format(-format F) of the Date/Time to be of type long date long time. The ToString is to convert the current date/time to a string so that I can merge it with the timezone([string][TimeZoneInfo]::Local.DisplayName) as a single sentence
Time to start the deployment
When requesting for user input of the file name, we write each of the filename to an array called…..filename. Now we will need to call out each individual item in the filename array to perform the deployment.
ForEach ($item in $filename)
Copy-Item -Path $inputsource\$item -force -Destination $inputDestination
Differentiating the source and destination file
After completing the file copy, we will need to verify if it is successfull by getting the hashfile, filesize and datemodified of each file. One at the source and one at the destination. So in order to cater to that, we will create a 2D array (An array sitting inside another array). This is to house the text ‘Source’ or ‘Destination’ (I use that to differentiate if the information is for the file at the source or destination) and the Source Location (which is in $inputsource) and Destination Location($inputDestination)
$SourceOrDestinations = @((“Source”, $inputsource),(“Destination”,$inputDestination))Get all the file information(hashcode, timestamp, datemodified)
Using the 2D array, we will get the file information of the file at the source and destination. Foreach will allow us to read the source and followed by the destination.
1
2
3
4
5
6
7
8
9
10
11
12
13
14
15
16
17
18
19
20
ForEach($choice in $SourceOrDestinations)
{
	$object = New-Object PSObject -Property @{
		Path = $item
                    }
	$fullfilepath=$choice[1]
	$itemsize = (Get-Item "$fullfilepath\$item").length
	$itemdate = (Get-Item "$fullfilepath\$item").LastWriteTime

	$stream = ([IO.StreamReader]"$fullfilepath\$item").BaseStream
	[string]$hash = -join ([Security.Cryptography.HashAlgorithm]::Create( "MD5" ).ComputeHash( $stream ) | ForEach { "{0:x2}" -f $_ })
	$stream.Close()

	$object = Add-Member -InputObject $Object -MemberType NoteProperty -Name "Location" -Value $choice[0] -PassThru
	$object = Add-Member -InputObject $Object -MemberType NoteProperty -Name "Size" -Value $itemsize -PassThru
	$object = Add-Member -InputObject $Object -MemberType NoteProperty -Name "Date Modified" -Value $itemDate -PassThru
	$object = Add-Member -InputObject $Object -MemberType NoteProperty -Name "Hash" -Value $Hash -PassThru

	$objects += $object
}
Click here for explanation of code above
Line 1 is to loop the array to read the source path followed by the destination.Line 2 and 20(the last closing curly bracket) wraps the code that is required to get the file information of each file(One for source and one for destination).
Line 3-5 is create the object required to display the information in tabular format. Line 6 is to get the file path which is residing in the SourceOrDestination array.
Line 7-8 is to get the file information required (filesize .length and datemodified .LastWriteTime).
Line 10-12 is gets the hash code.
Line 6-12 writes the information of location, filesize, date modified and hashcode of the file in object array.
Line 14-19 writes all the information collected from Line 6-12 into the objects array so that it can be displayed in tabular format later.
Adding the finishing touches
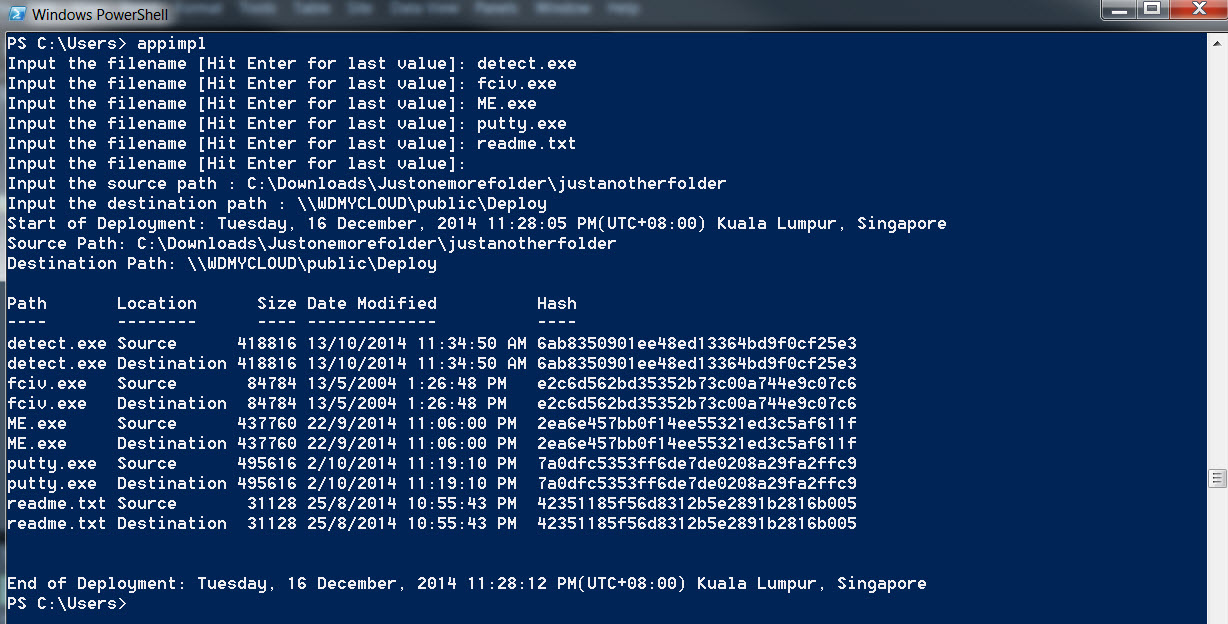
Well at the end we can finally display all the information in the tabular format. In addition I added the Source Path and Destination as part of the output so we do not need to bloat the information that is in tabular format as we can exclude the full path just mentioning whether it is from the Source Path or Destination Path.
Write-Host ‘Source Path: ‘ + $inputsource
Write-Host ‘Destination Path: ‘ + $inputDestination
write-output $objects | format-table -autosize
‘End of Deployment: ‘ +(get-date -format F).ToString() + [string][TimeZoneInfo]::Local.DisplayName
So that’s all to it. To see the code altogether, get to last section of the introduction post.

