Create a document expiry reminder system in SharePoint
One of the main usage of SharePoint is a Document Management System where you can setup a Library to store documents in electronic format and setup version control so that all changes are tracked. I will show how we can enhance on that to create an email alert system via email to keep track of Documents which have expiry dates(e.g. Process Documents which needs to reviewed yearly).
SharePoint Library
We will only need one SharePoint Document Library to achieve this. I have named the Document Library as Documents_With_Expiry.
I always create names of Library for use in SharePoint join together with underscore(_) because this will create an easier url to be displayed. Using a space is a norm but that results in conversion to %20 when it becomes a URL. You can change the underscore to a space as norm after the Library is created as the URL will not change anymore. Doing this way shortens the number of characters for URL from 3 to 1 which is beneficial if you use windows explorer mode in SharePoint often because Windows Explorer can only support up to 256 characters for path before you cannot open a file anymore.
Go to Library->Settings->Versioning settings. Set Create a version each time you edit a file in this document library? to ‘Create major and minor (draft) versions’. The rest to leave as default.
Go to Library->Settings->Versioning settings. Set Allow management of content types? to Yes. The rest to leave as default.
Go to Library->Settings>Content Type->Click on ‘Document’->Click on ‘Title’. Set This Column is to ‘Hidden (Will not appear in forms)’.
Go to Library->Settings. Add the below new fields required. You can leave the fields which are already as default when you create the Document Library alone, we are not going to use it.
| Fields | Type | Explanation |
|---|---|---|
| Document Owner | Person or Group | This is to determine who to alert for the document expiration. Set Allow selection of to “People and Groups” and Require this column contains information to “Yes”. The rest to leave as default |
| Effective Date | Date and Time | This is to determine the expiry date of document. For example, the effective duration is 1 year then the expiry will occur in 1 year’s time. Set Require this column contains information to “Yes”. The rest to leave as default |
| Expiry Date | Calculated (calculation based on other columns) | This is to calculate the expiry date of the Document based on the effective date. For example if the effective duration is one year, input in the Formula field+365. The data type returned from this formula to set to Date and Time. The rest to leave as default |
Test out the Library
Once everything above is done, we can do a test on the Library. Try to drag and drop a document in the Document_With_Expiry Library
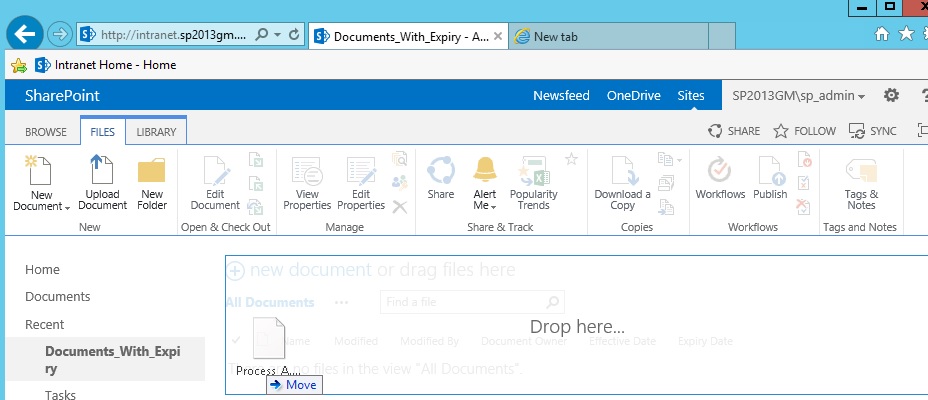
Once done, you will see a green southeast pointing arrow against your document’s symbol which you have just copied in.

This is an indication the file is not checked in yet as you have not filled in the mandatory fields. Select the Document and go to Files->Edit Properties.
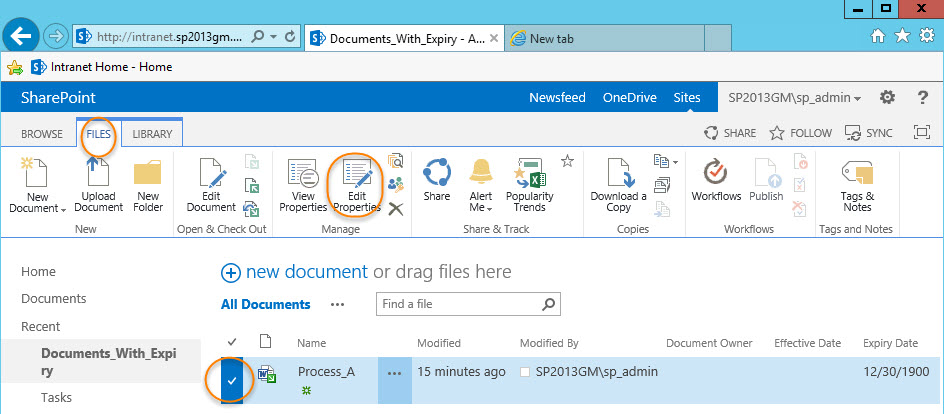
Input the Document Owner (You can create SharePoint User Groups or individual Windows ID if your SharePoint is linked to Active Directory) and Effective Date(which is the date this document is effective and SharePoint will help to calculate the expiry on your behalf). Then click on Save.
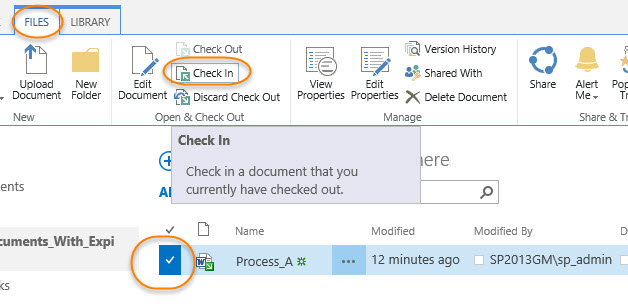
Now you can check in the document. Select the Document and go to Files->Check In.
Create SharePoint Workflow for Alert System
Now we are on to the part of the enhancement of the Document Management System which is the Expiration Alert System. We will achieve this via a SharePoint Workflow
Go to Library->Workflow Settings dropdown arrow->Create a Workflow in SharePoint Designer

Name your Workflow and set Platform Type to ‘SharePoint 2010 Workflow’. Note I used a SharePoint 2010 Workflow for this despite using SharePoint 2013 as the 2010 Workflow is good enough to get this done. So you can do this in both SharePoint 2010 and SharePoint 2013.
SharePoint Workflow
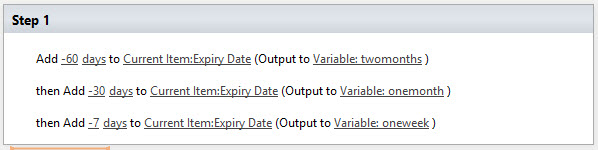
I am going to create reminders prior to the expiration at 2 months, 1 month and 1 week. To do this, we need to create 3 Date/Time variables to create the date of reminder using the Add Time to Date Action in SharePoint Workflow Designer. See below for code.
If Else for the reminders
We will need to capture all the possible scenarios so that we will be able to send out the emails accordingly. There are a total of 4 scenarios which we wrap inside if else statement to form the reminder system
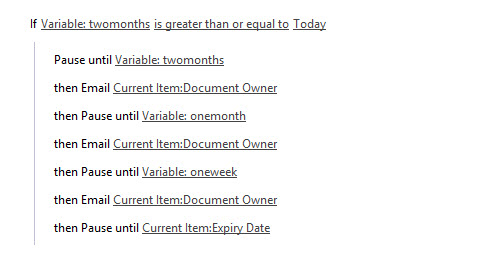
1. Expiry Date is more than or equal to 2 months from today
We will need to send email out when it hits exactly two months, one month, one week and when it expires. See below for code
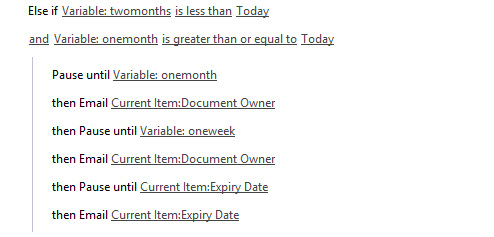
2. Expiry Date is less than 2 months and more than or equal to 1 months from today
We will need to send email out when it hits exactly one month, one week and when it expires. See below for code
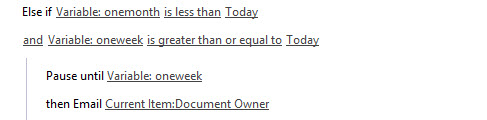
3. Expiry Date is less than 1 month and more than or equal to 1 week from today
We will need to send email out when it hits exactly one week and when it expires. See below for code
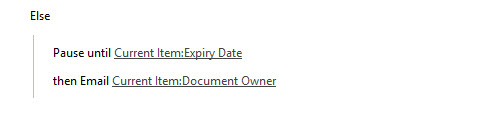
4. Expiry Date is less than 1 week from today
We will need to send email out when it hits expiry date. See below for code
Conclusion
This is a very simple workflow which can be created in half an hour. There are further enhancement possible to make it more intuitive. Notice my workflow have Email CurrentItem:DocumentOwner which i did not eloborate further on how to do it. That will be discussed in my next post as it can be very broad indeed.

